
How I Built a Professional, Broadcast-Quality Vocal Booth for $1500
I built a professional, broadcast-quality vocal booth in my unfinished basement for roughly $1500 which included shelling out for some under-the-table hired hands.
(scroll to the bottom for the materials I used and a loose pricing breakdown)
I wrote an earlier post about my closet booth, which was motivated by the need to make legitimate recordings when I first started out in voiceover. It technically wasn’t my very first booth, because that was this one:
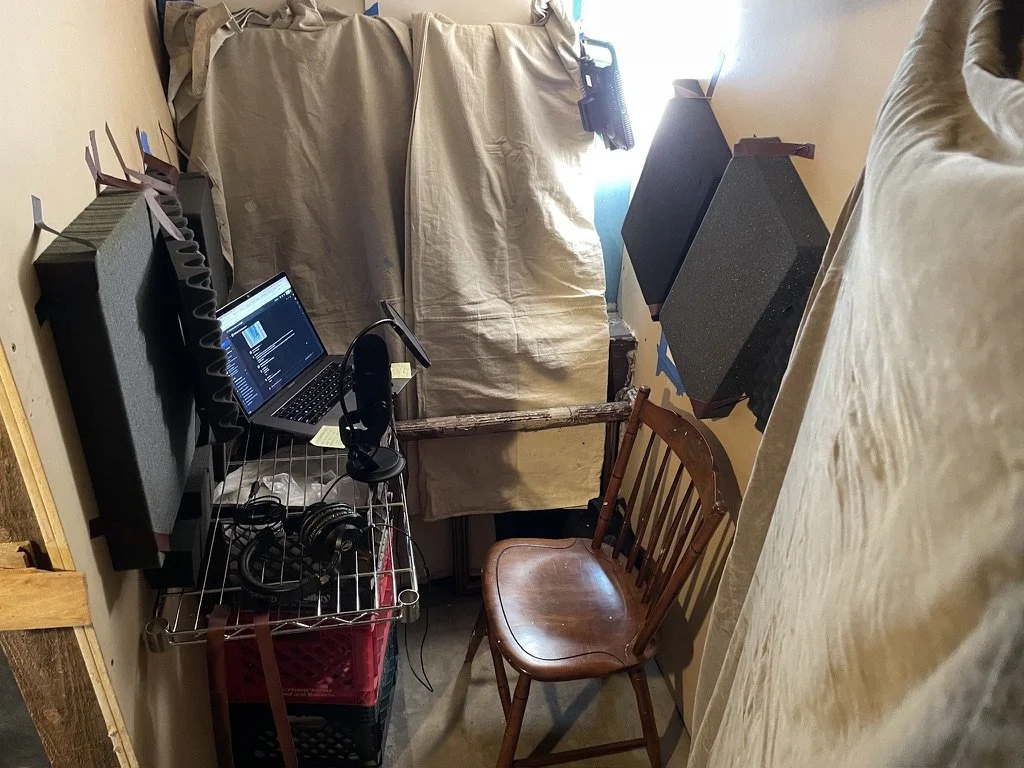
The Weird Room aka First Booth
When my wife and I bought our house, there was this weird little enclosure in the unfinished basement that had a sliding door. We joked that it was some kind of strange torture chamber because of course one would think that when seeing a lone room built out in an otherwise raw basement. But, we found out from the seller that the person who owned the house before them was a tile contractor and used that room for cutting tile to mitigate dust. There’s some holes in that story that we didn’t poke, but at the end of the day I had this little weird room that we did nothing with for many years until I decided to make a go of voiceover.
I had a Yeti mic and a bunch of spare foam from Pelican cases so I grabbed a roll of gaffer’s tape and cobbled together a table from milk crates and leftover shelving. I had my first booth. But it sucked. It sucked real bad. I live in a 120-year-old house and you can hear every footstep. In the basement, it sounds like all those are amplified, so it didn’t take long to decide to build that closet booth. Go check out that post if you want to learn how to build a passable booth for cheap. Here’s what that one looked like:
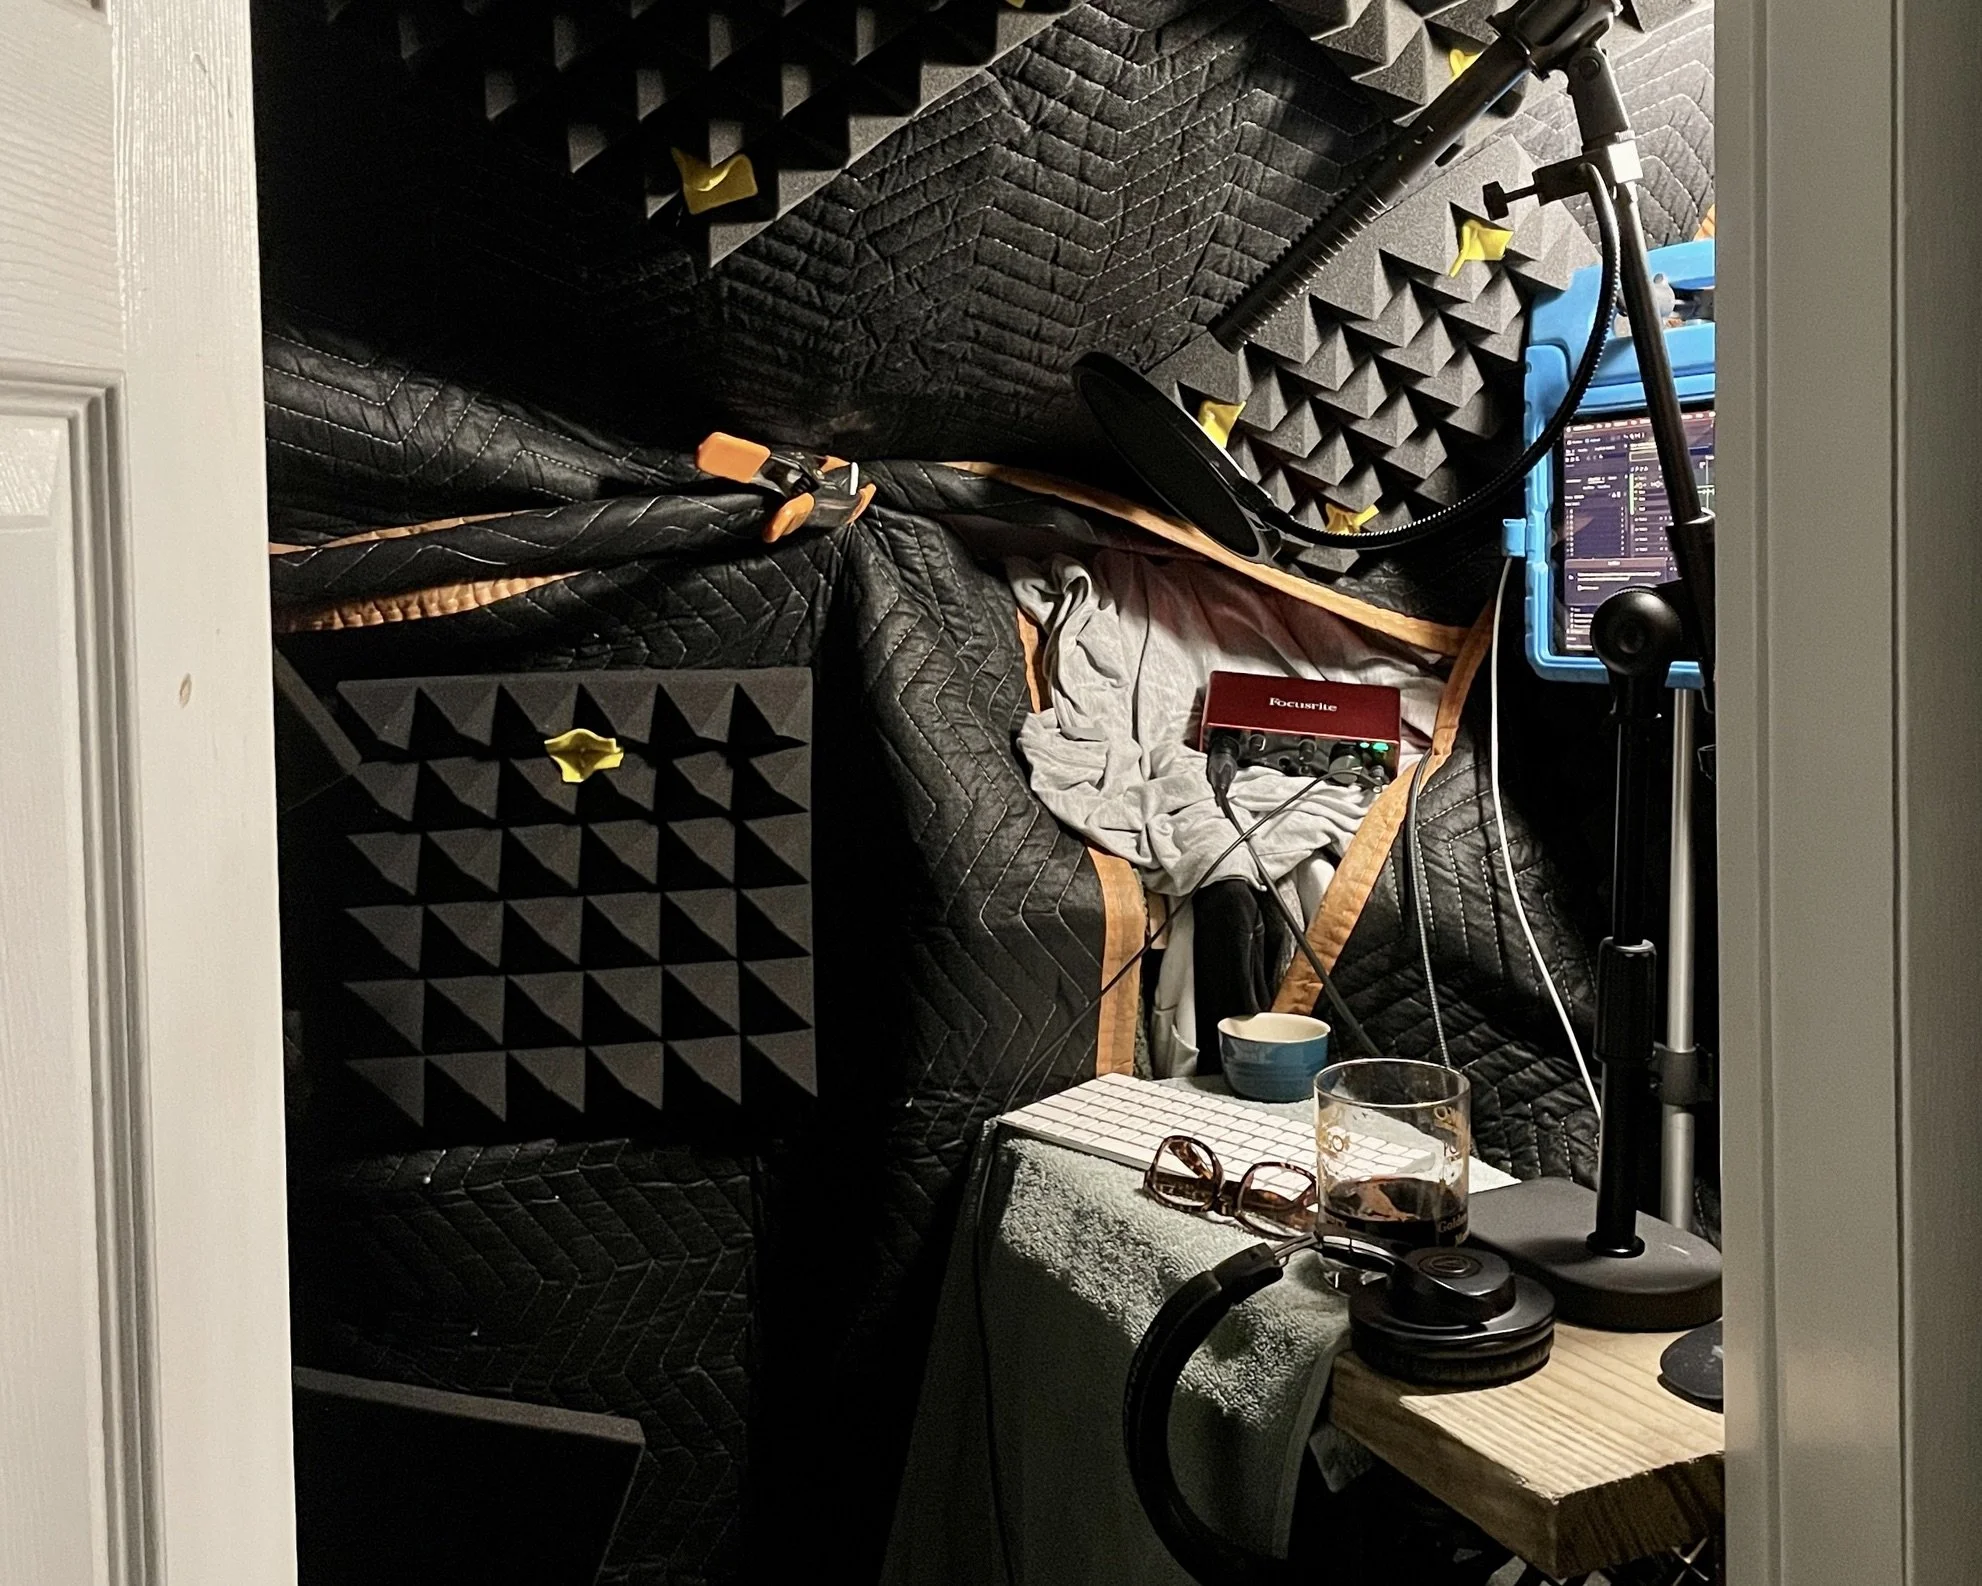
The Closet Booth (RIP)
But I needed to upgrade from the closet booth. Motivating the need for a legit, broadcast quality booth were several things:
It was VERY tight in there. At 6’1”, I couldn’t really stand up straight. I had to tilt my head if I wanted to stand with my back straight and I’ve never enjoyed performing sitting down. I could barely turn around in there, and I had several layers of moving blankets on either side of the door which made entering and exiting very cumbersome.
It was my wife’s actual closet. You know, like, for clothes. I had to build that booth using hooks and grommeted blankets and a shower curtain tension rod so that I could convert it back to regular-closet-mode when I was not recording. This ate up a ton of time for setup and teardown.
We had greenlit a huge construction project that would essentially demolish that entire closet so the clock was ticking to find a solution so I could continue recording.
The obvious answer to me was using my unfinished basement and the existing weird little room. But I knew that I couldn’t use the weird room as-is because:
it was located directly under our living room so there was lots of foot traffic above me at all times, with a very creaky 120-year-old hardwood floor.
It was built around a window which would need to be heavily treated and covered up and seemed like a fool’s errand to try and deal with
The opening to the basement was huge because it previously had a sliding door which had since been thrown out so I had a gap of about 3.5ft for my doorway and would have to have built in more framing to handle that
But it had legit framing and a very beefy ceiling already built into it so I decided to try and salvage that existing construction work and relocate it to a quieter part of the house. I chose a far corner where there wasn’t nearly as much foot traffic above me, and started demoing all the existing drywall out of the framing of the weird room, and used a reciprocating saw to remove the framing from itself, the walls, and floor—while retaining as much of its structural integrity as possible so that I could piece it together again easily in the new location.
Why didn’t I leave the drywall in? Great question. It’s because I had done a TON of research leading up to this, I read everything I could find about DIY vocal booths, everything from closet rigs to PVC contraptions to hiring acoustic professionals. I watched a LOT of YouTube videos.
The one I kept coming back to was this one from Sound Headquarters = DIY Home Studio Vocal Booth Build: Soundproofing, Floating Floor, and Professional Finishes!
Huge shoutout to Daniel Iacucci and his team. Not only are they builders of professional recording studios, but Daniel really put a lot of thought into this video. It’s not one of those overlong YT videos with 10 million “umms” and “like uhhs,” it’s obvious he set off to make this instructional video from the get go. Watch it and see what I mean.
Now, don’t use my blog post as a “here’s another way to build Daniel’s style booth.” I didn’t even remotely copy his build to the letter. They are actual pros who build pro shit for actual money. I’m just a doofus who’s pretty handy and overly confident.
I didn’t use their same framing techniques, not all the same materials, I had no floating floor, no Sonopan, and I certainly didn’t solder in my own XLR jacks. What I did do was watch the video a whole bunch of times to get the basic building philosophy of what he did and why, and then I tailored that to my space, my needs, my budget, the materials I’d have access to, my construction/carpentry skillset, and the amount of time I was willing to put into the project.
The main things I pulled from the video which I decided I was going to use were:
Two layers of 5/8" firecode-rated drywall on each side of each wall (and ceiling). This meant 4 layers of drywall for each wall. When you research sound treatment, you’ll see that mass is important. This is where my mass was going to come from.
Rockwool insulation inside the walls. You’ll encounter Rockwool a ton when reading about acoustic treatment. This is an industry-standard material for acoustics, and this is where the other part of the sound treatment was going to come from: absorption.
Solid-core wood door. No builder’s grade hollow BS here. I needed something heavy and dense.
Once I had the old frame cut out of the wall, I drew up some plans to reinforce it since it was not built to regular specs. The guy who originally built it was just trying to keep tile dust from covering his entire basement and ductwork. I now needed this frame to support many hundreds of pounds of additional drywall and also wanted to build to code as much as I could since the uniform gaps of a typical wall frame would perfectly accommodate the slabs of Rockwool that are precut to building code size. And who wants to custom-cut a ton of dense mineral wool insulation and have all those micro-shards flying all around their house?
The existing frame accommodated the foundation lip so that was good, and I added in a back wall to separate the booth’s back wall from the actual exterior wall of the house.
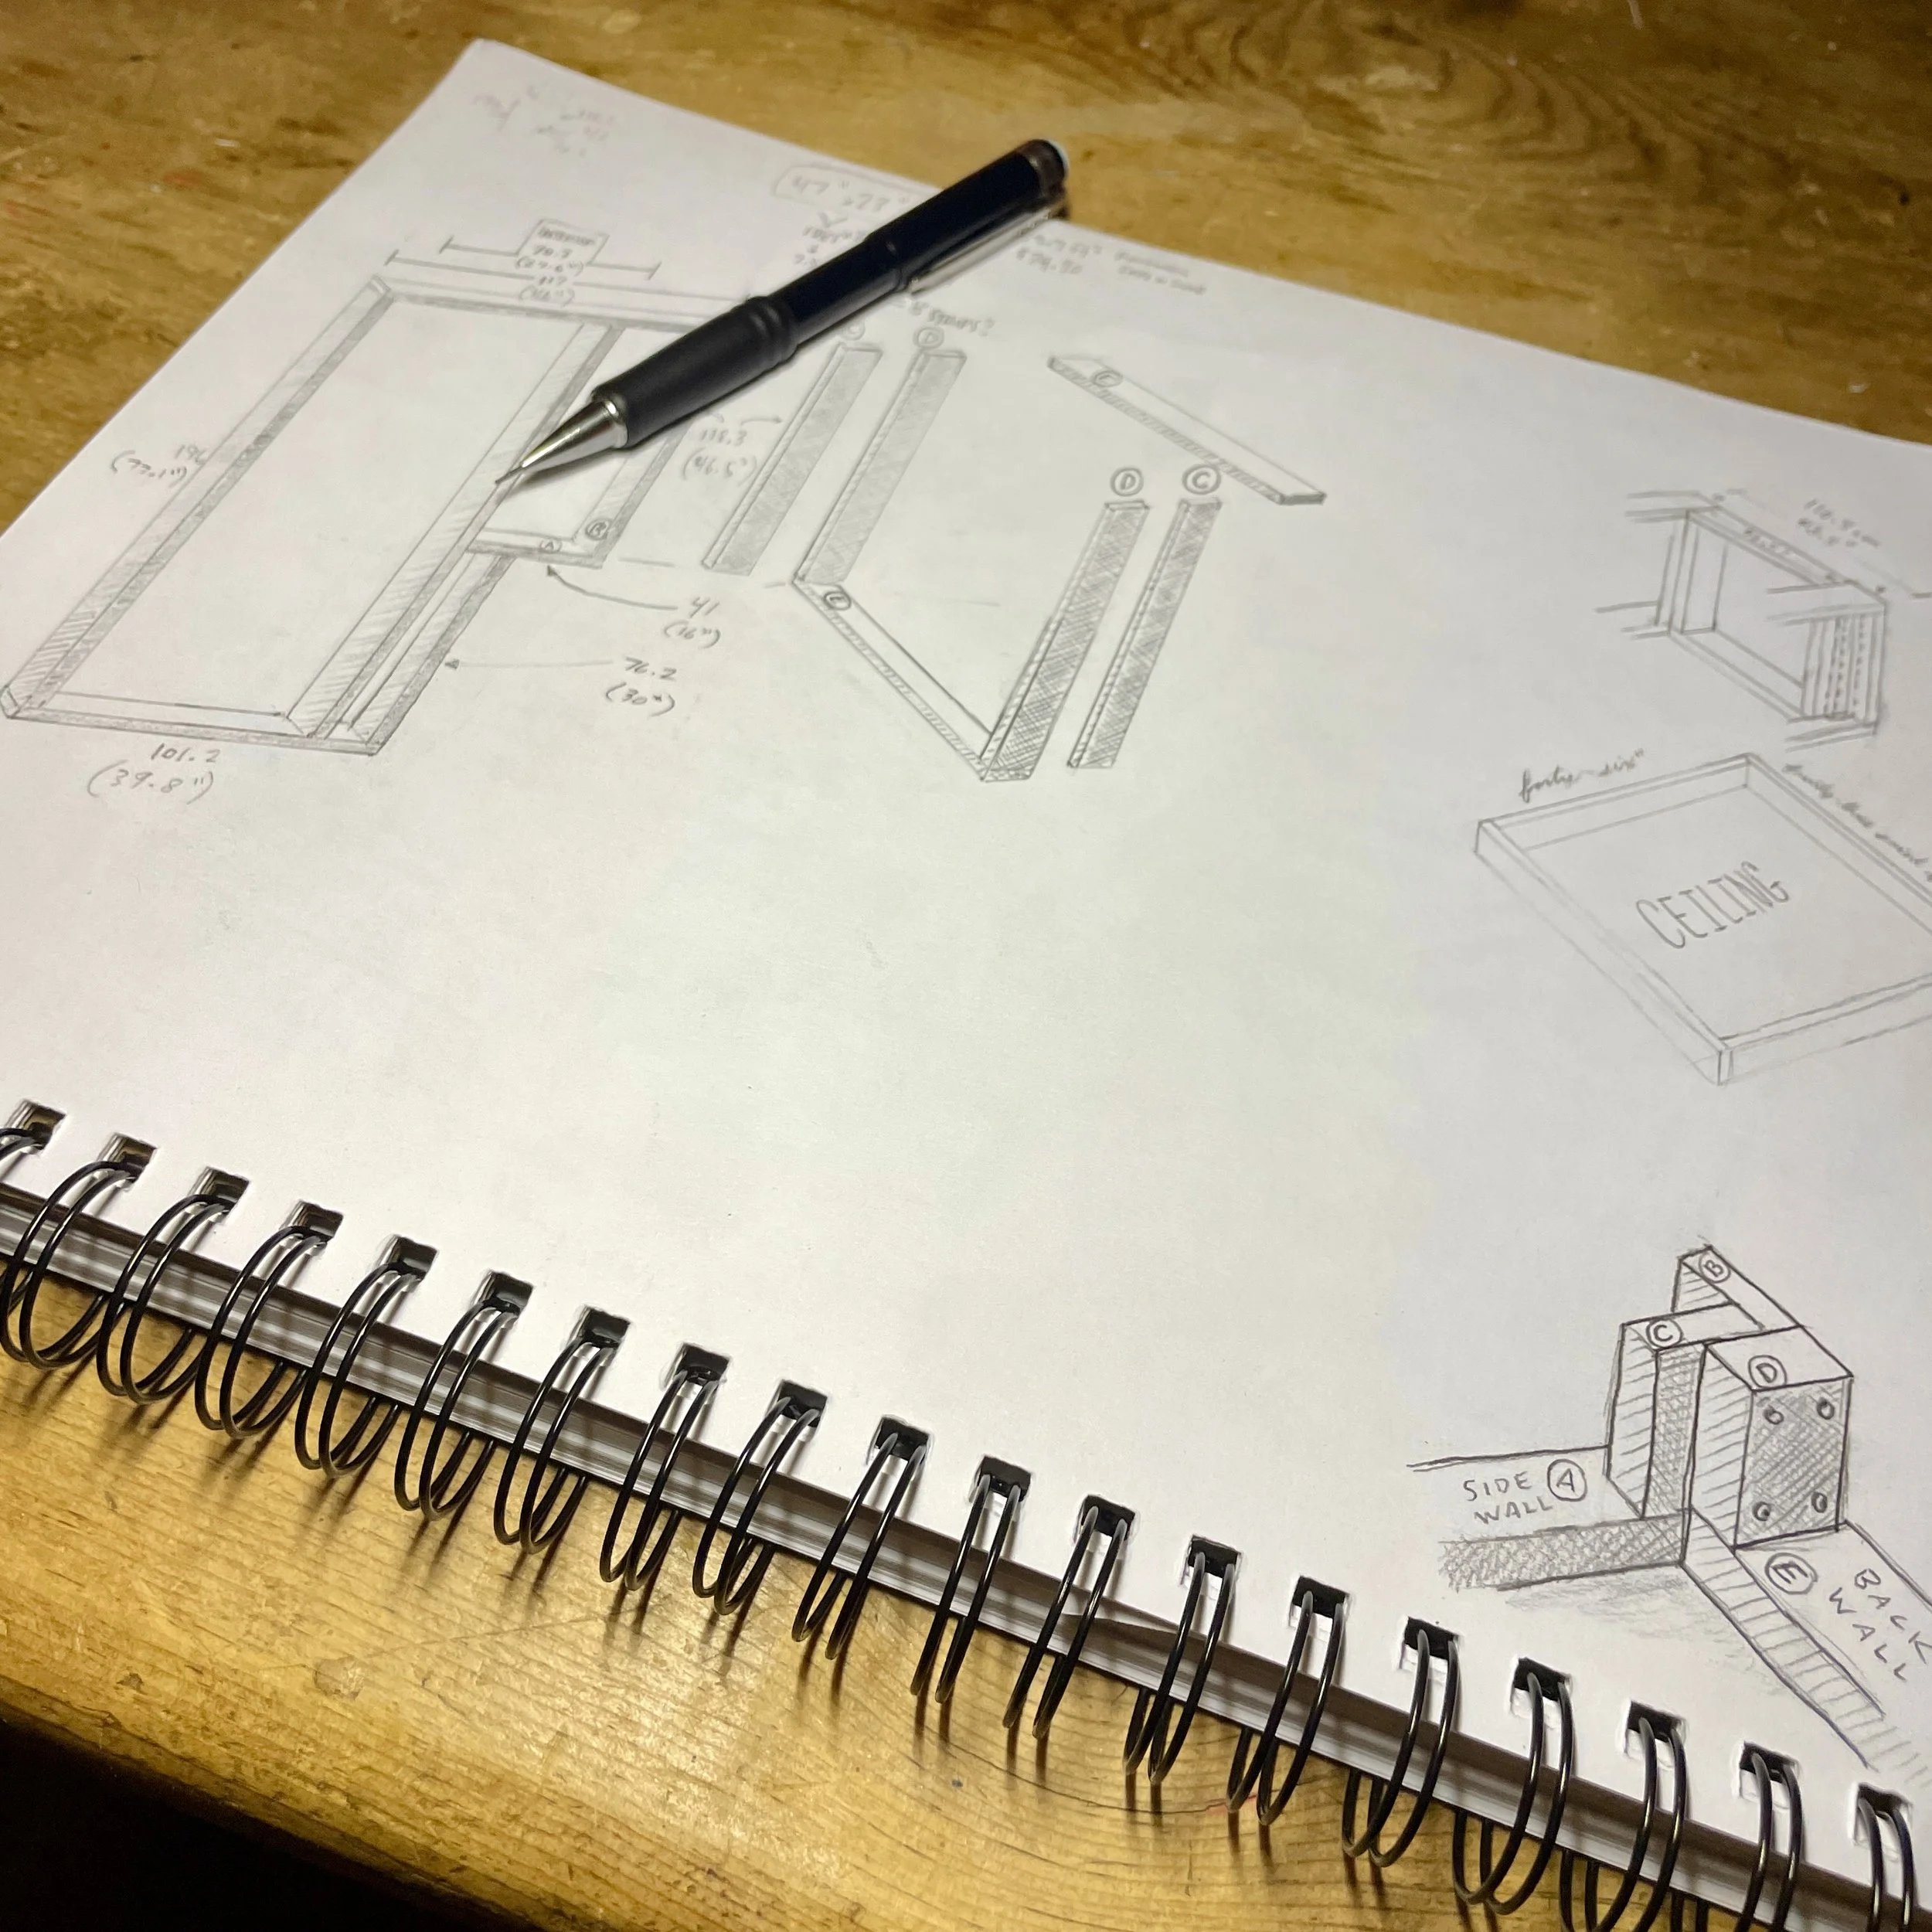
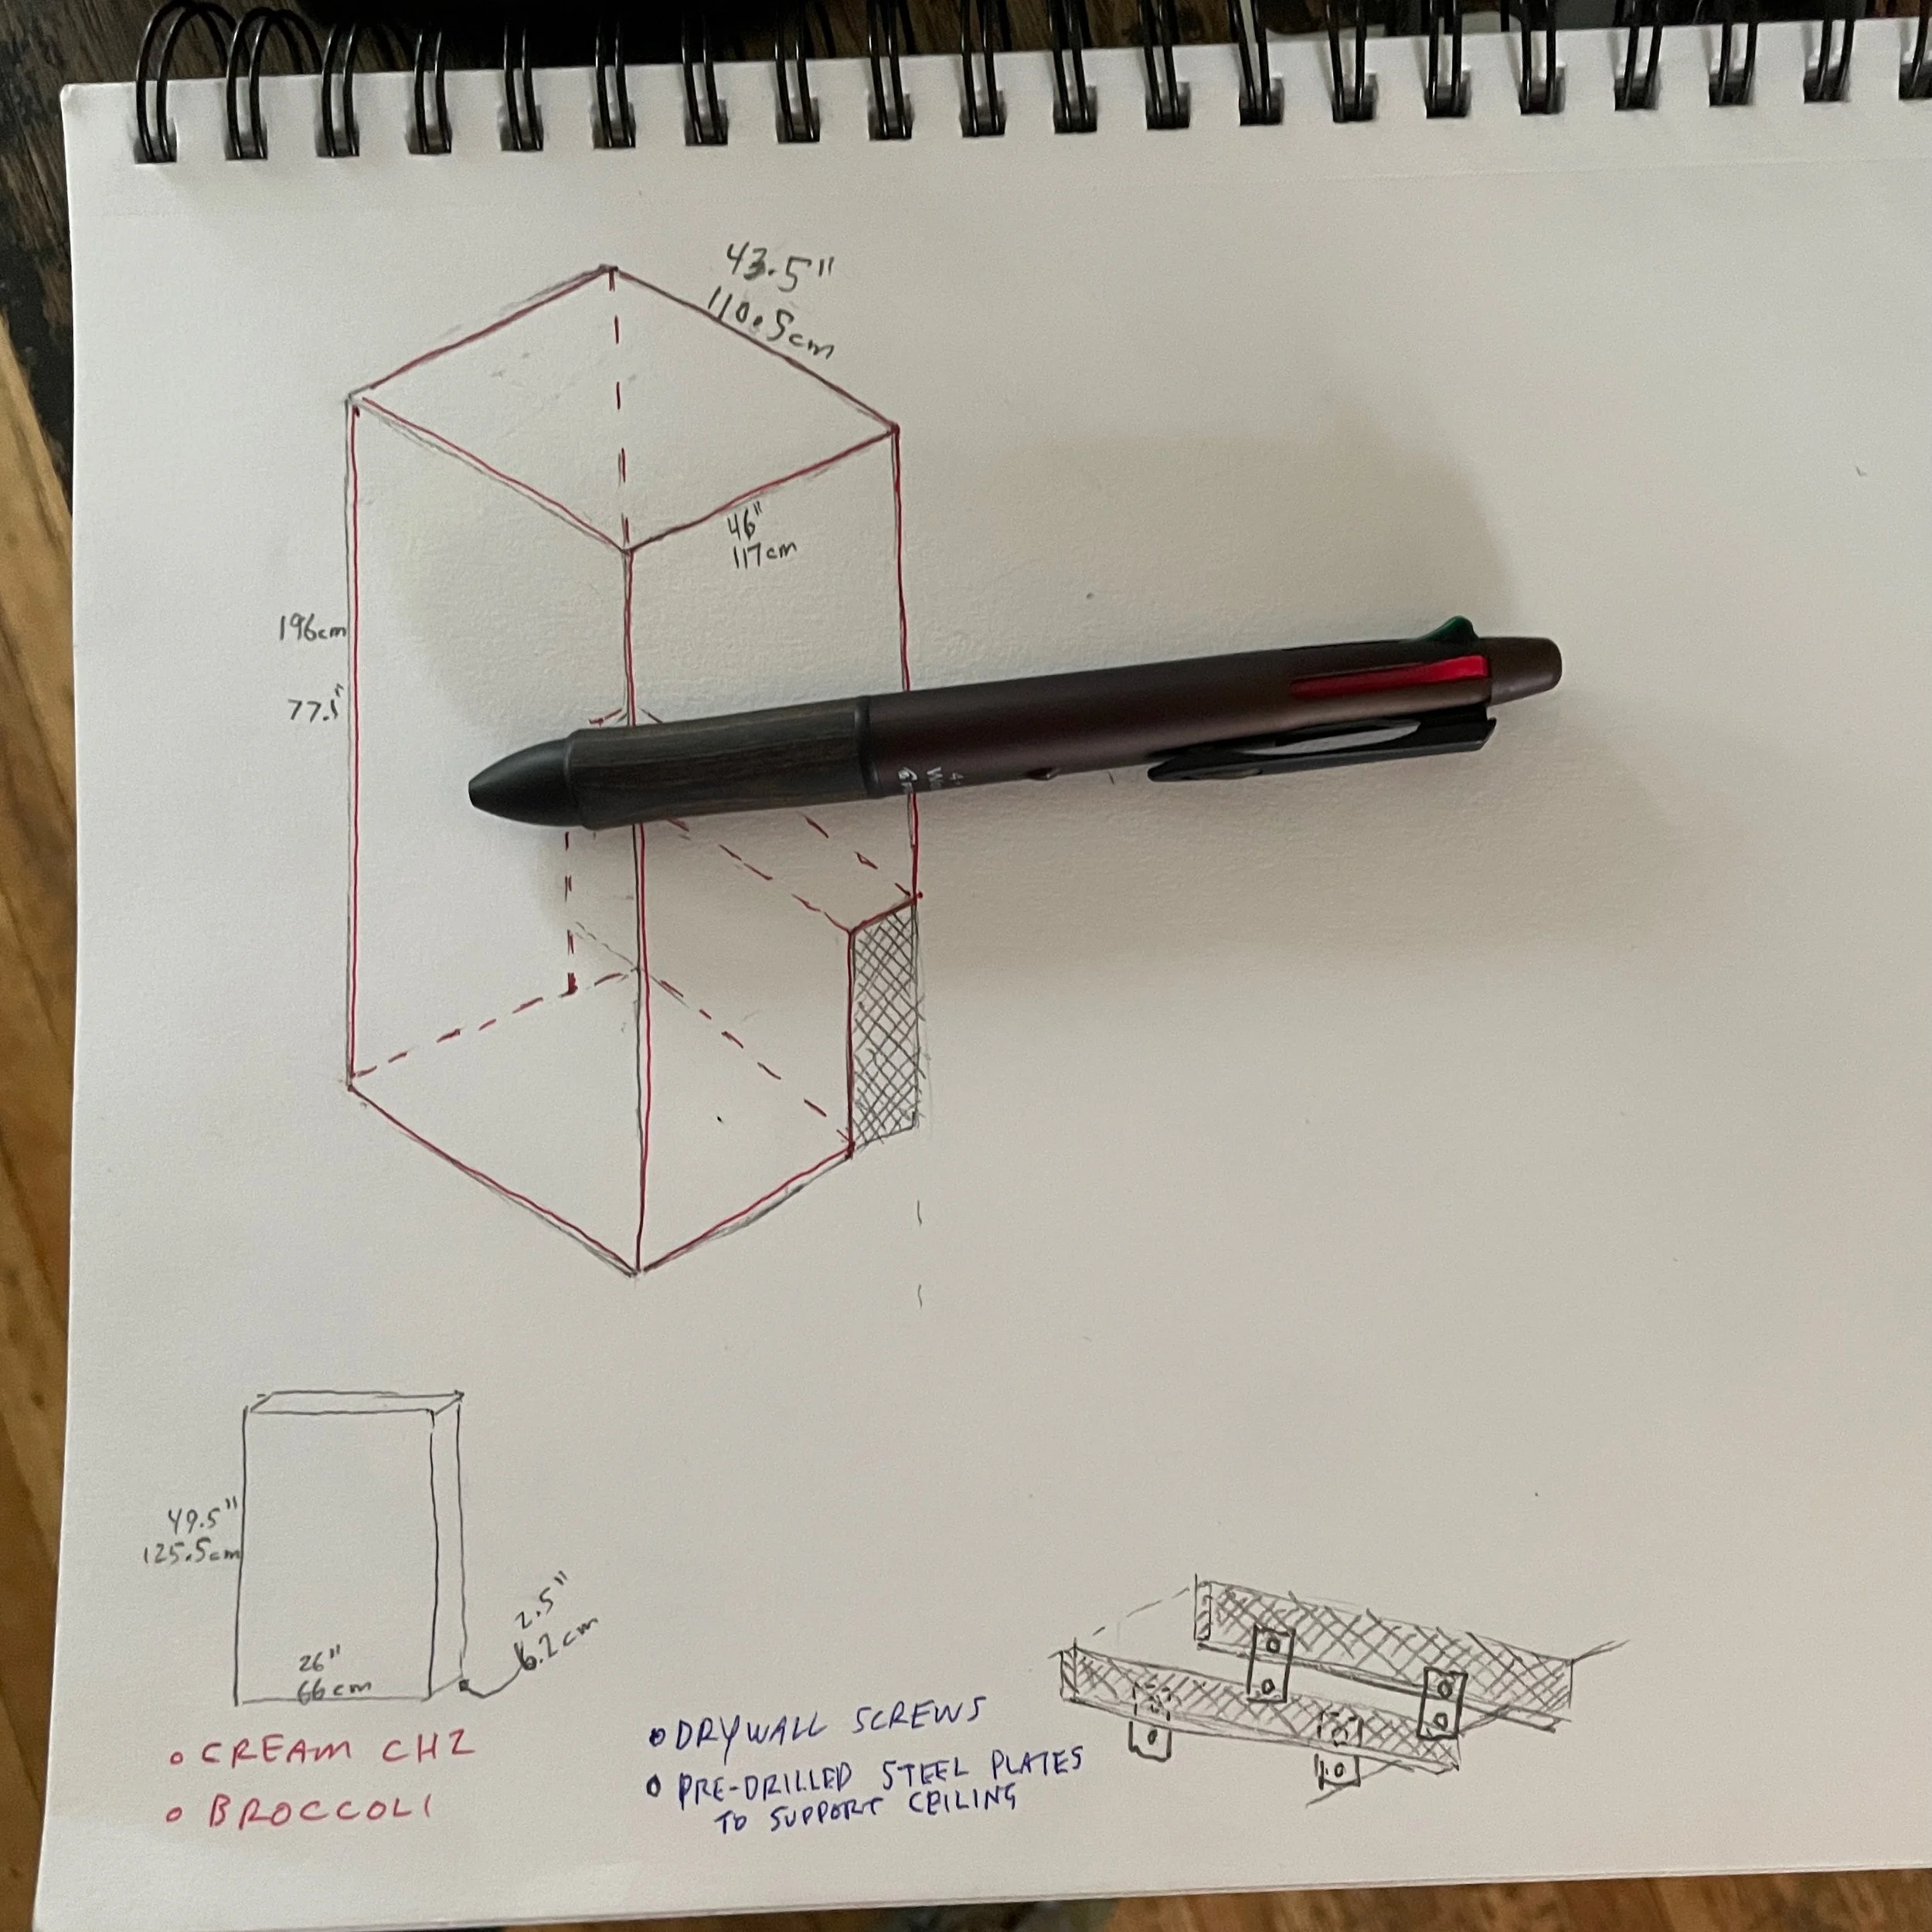
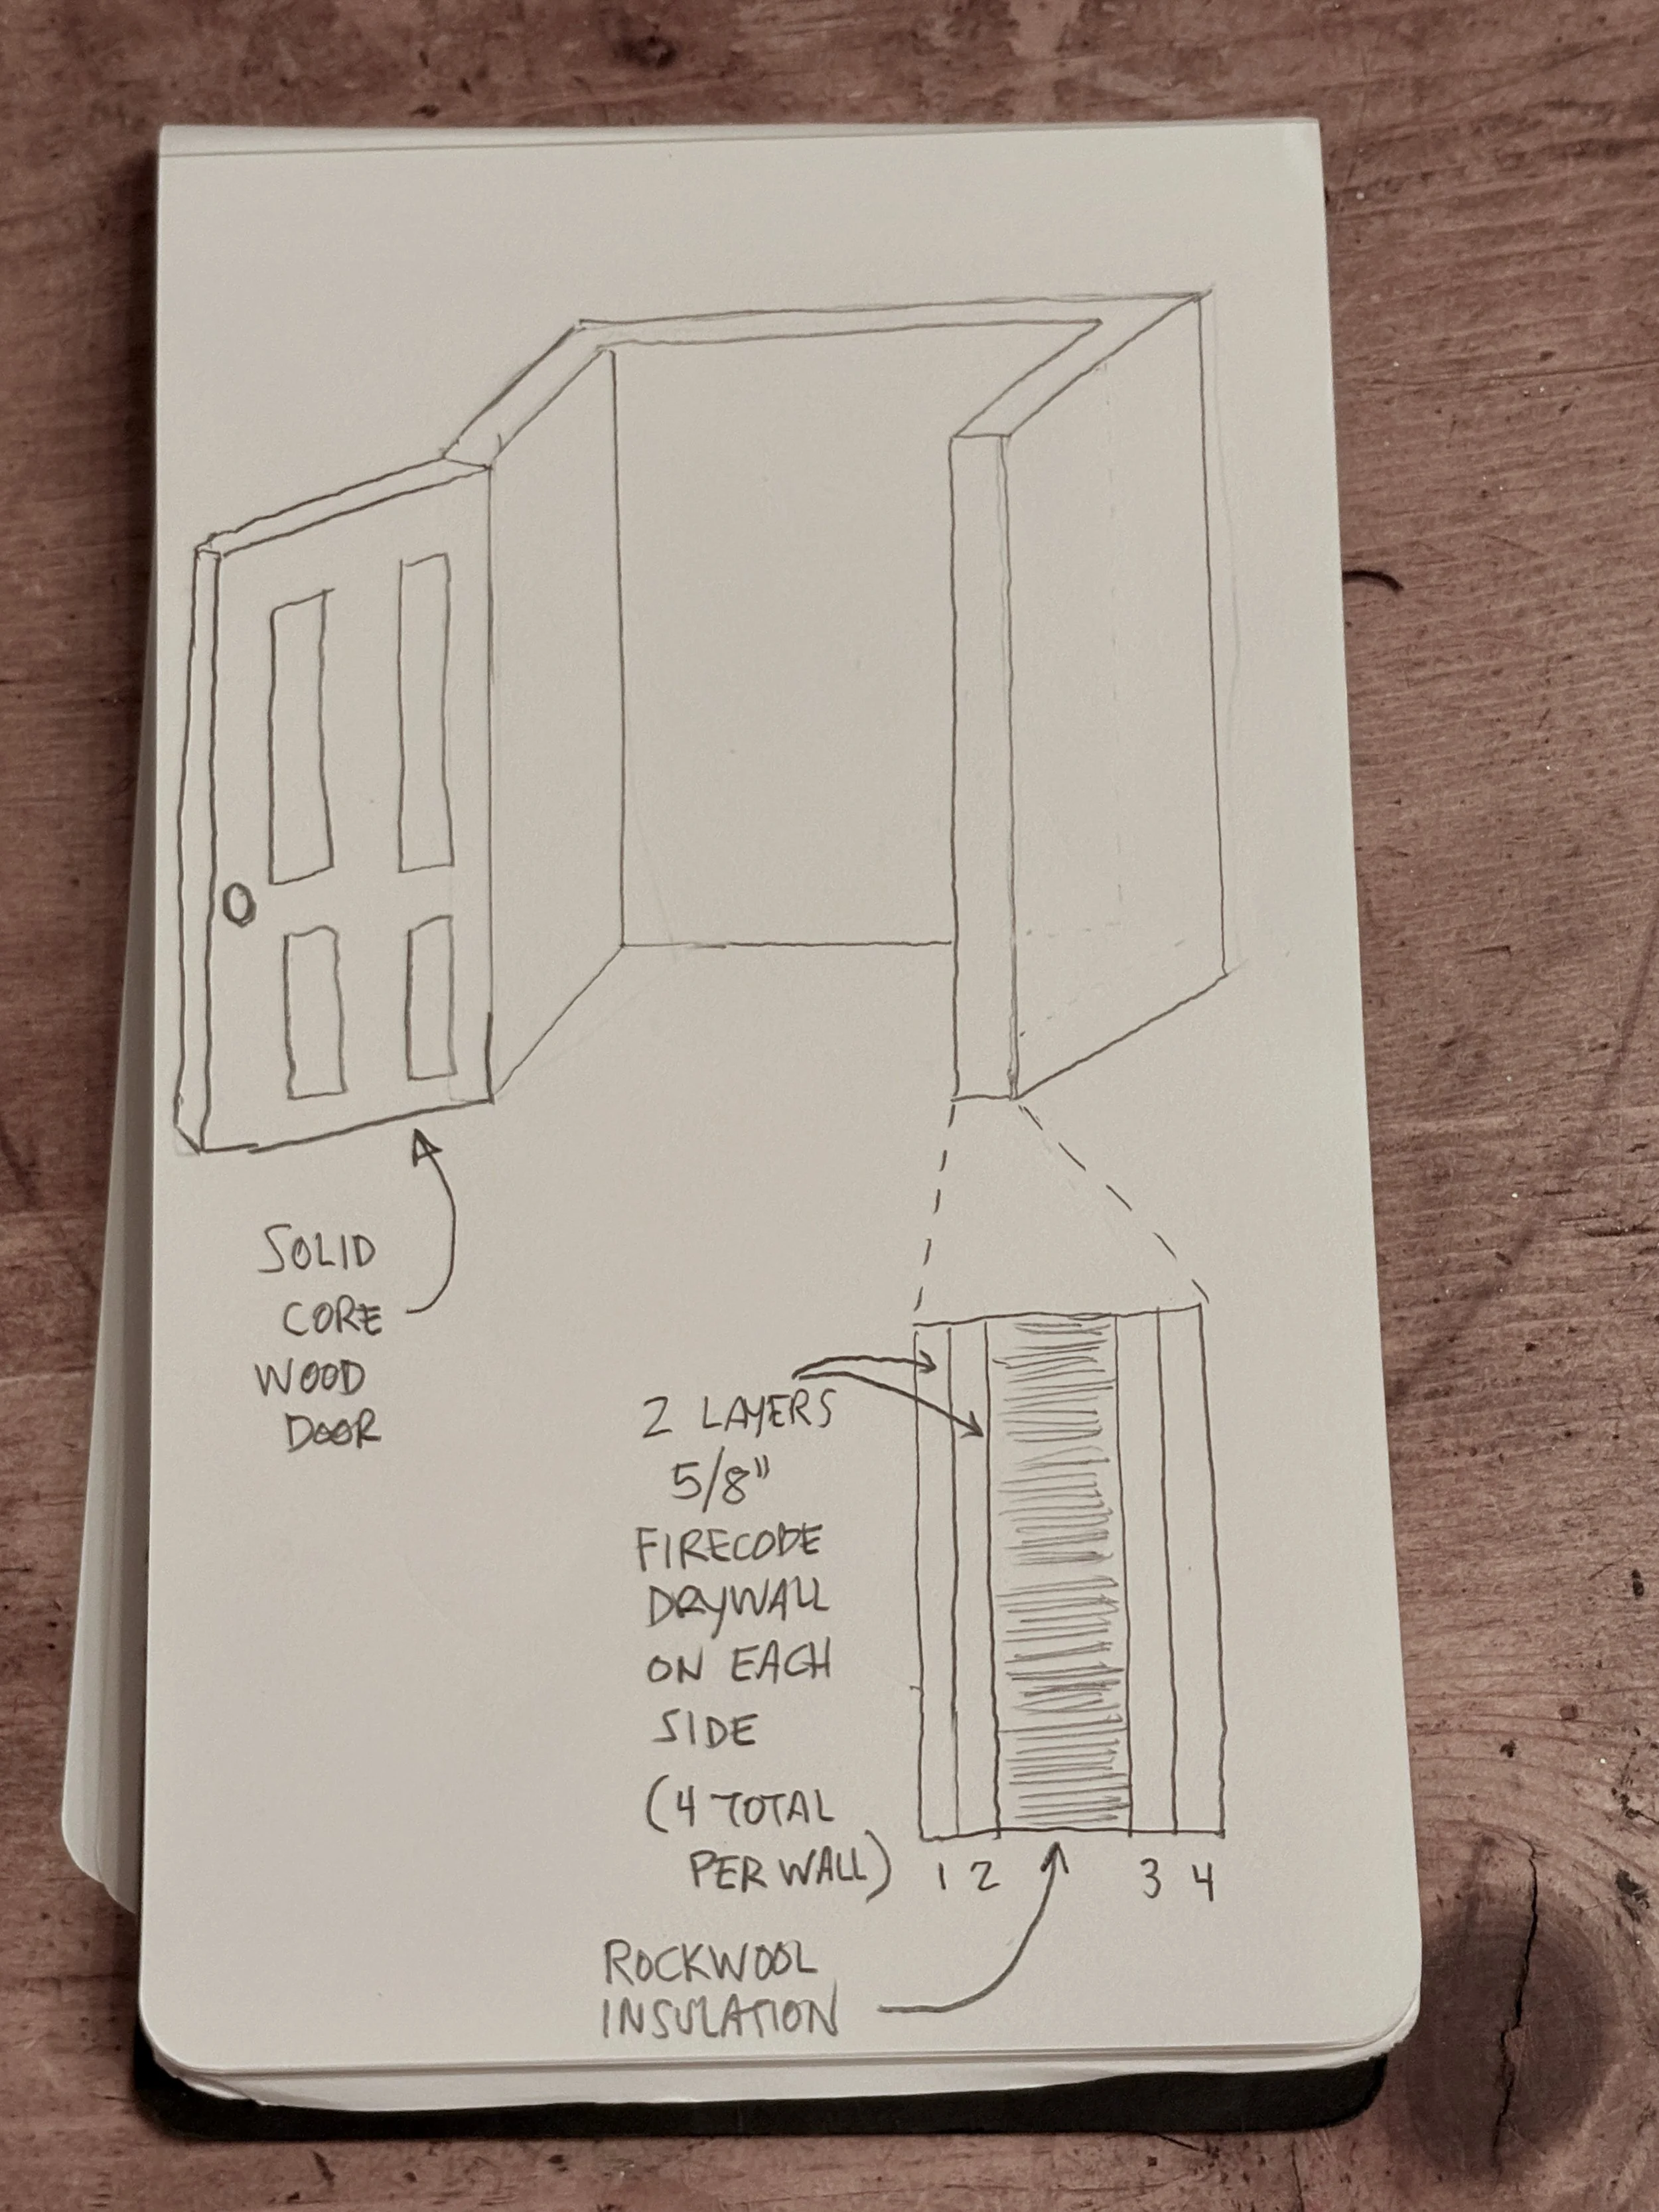
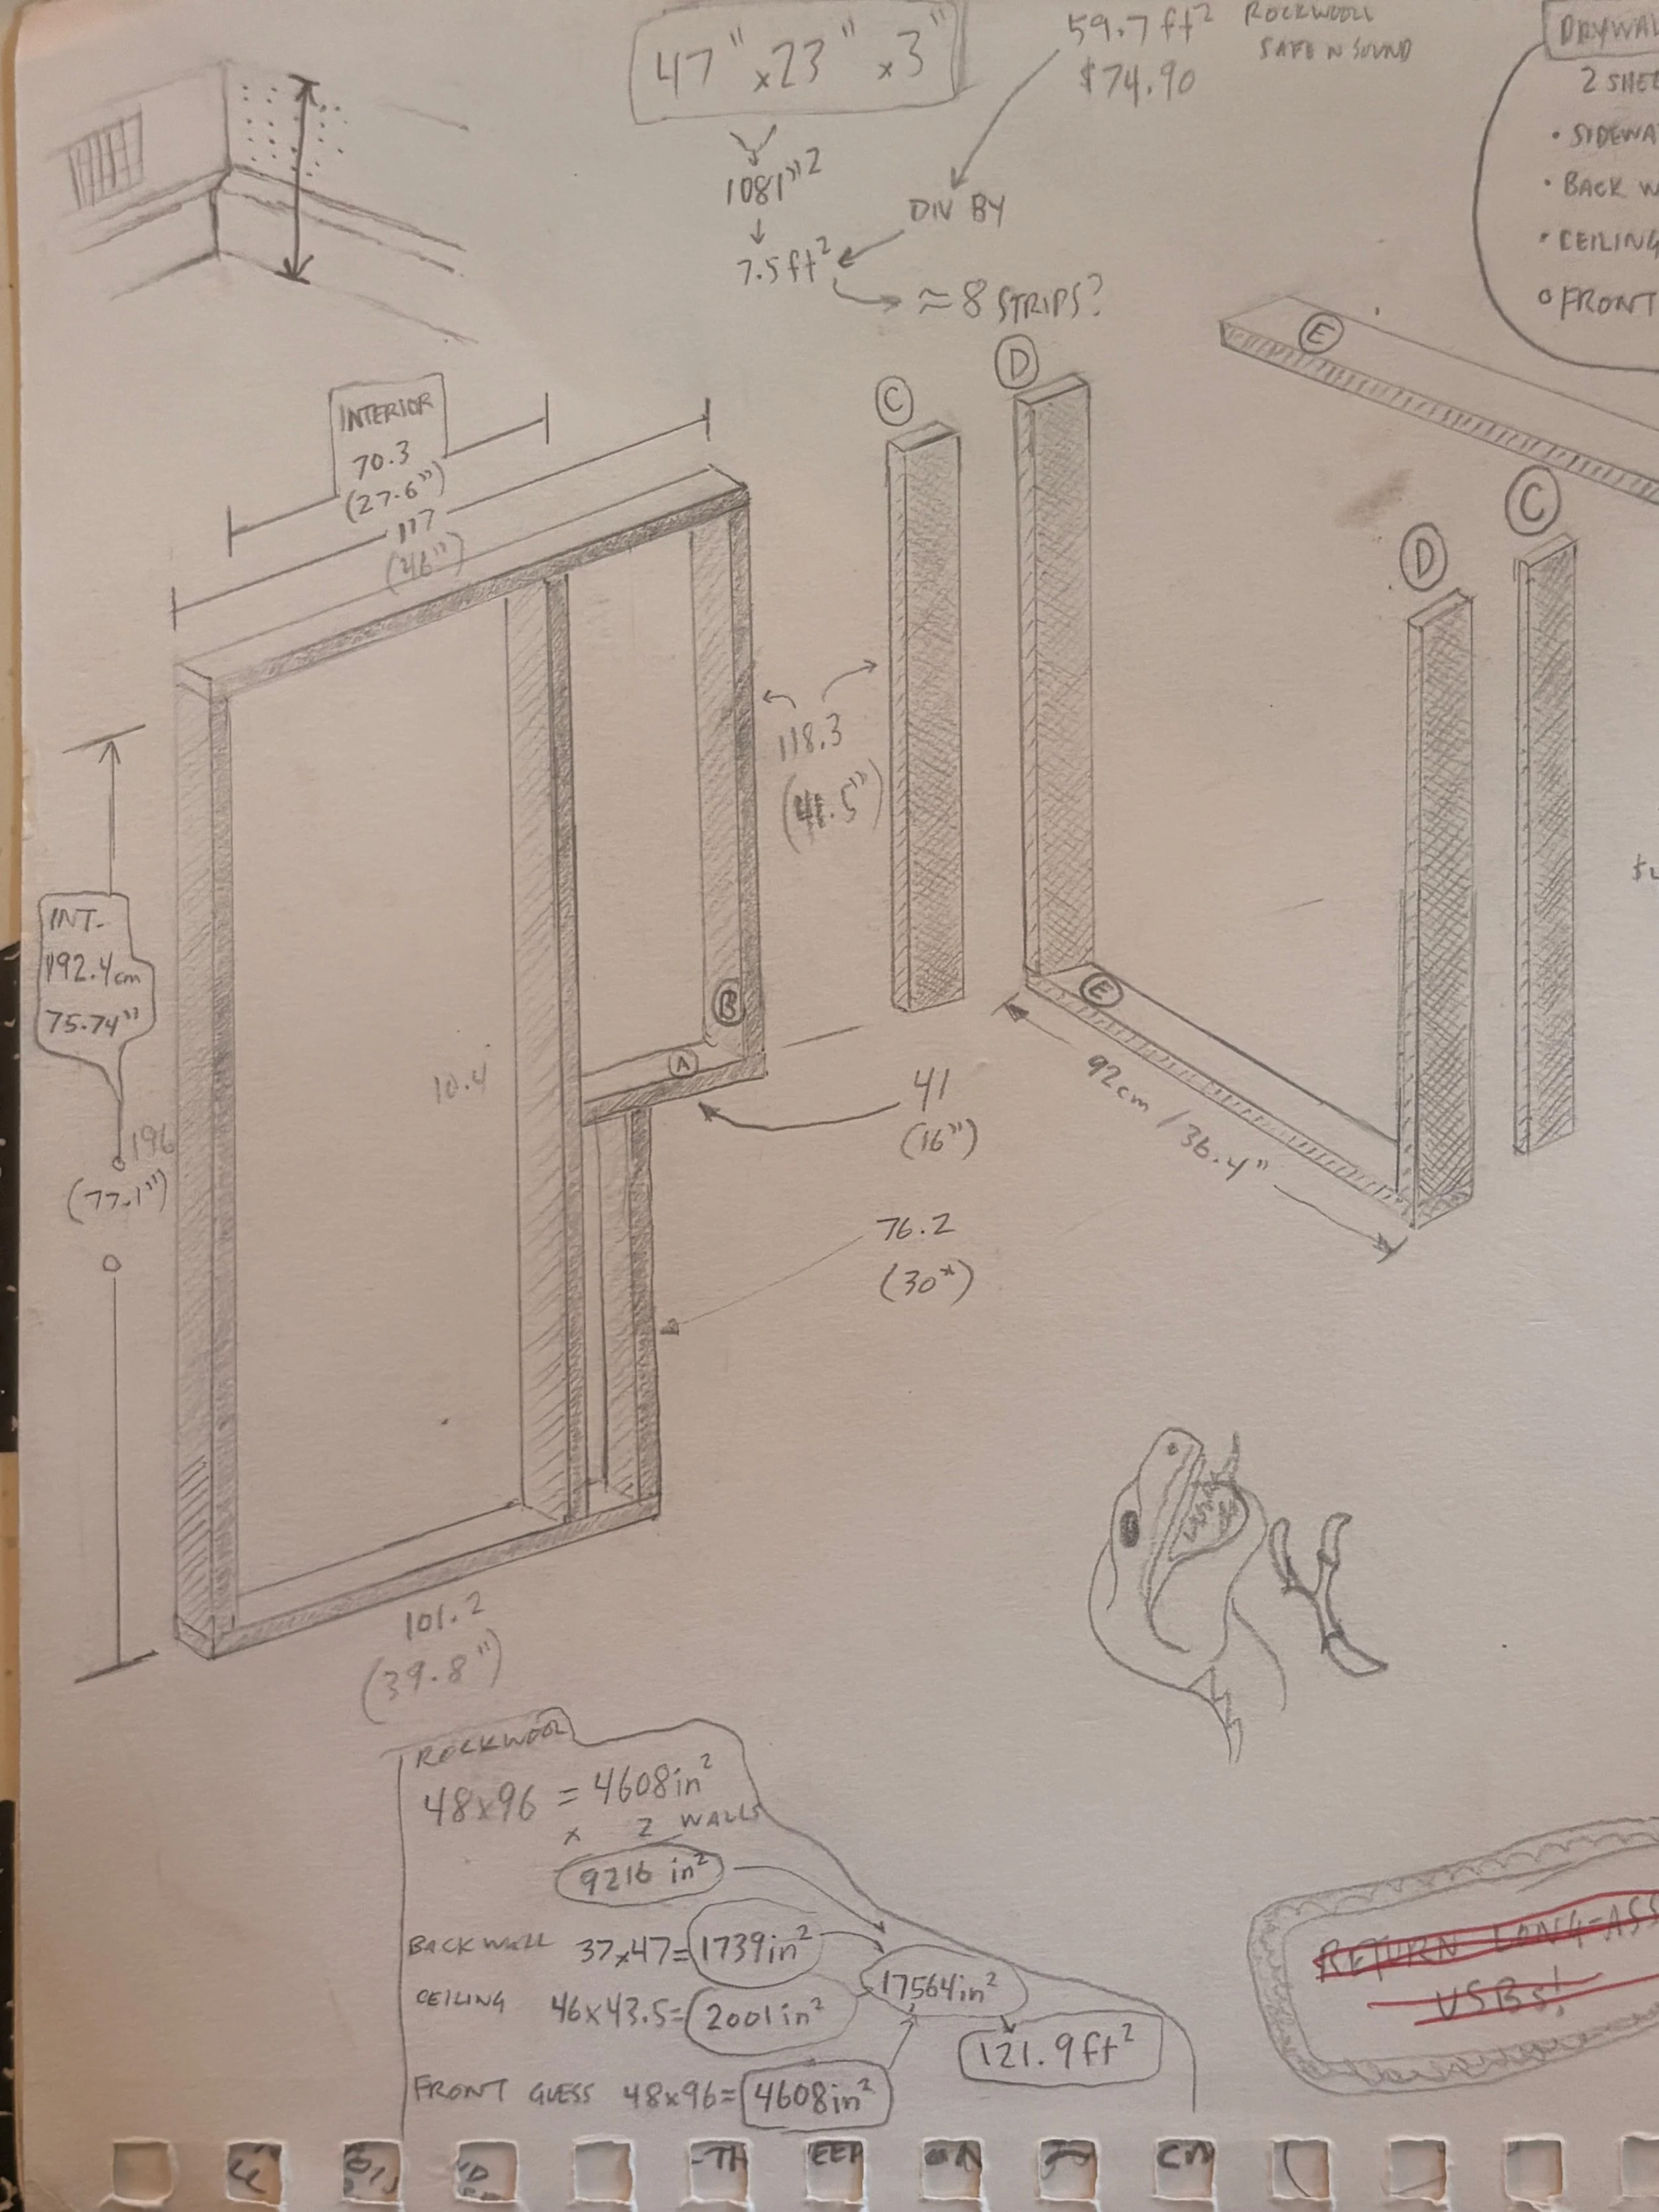
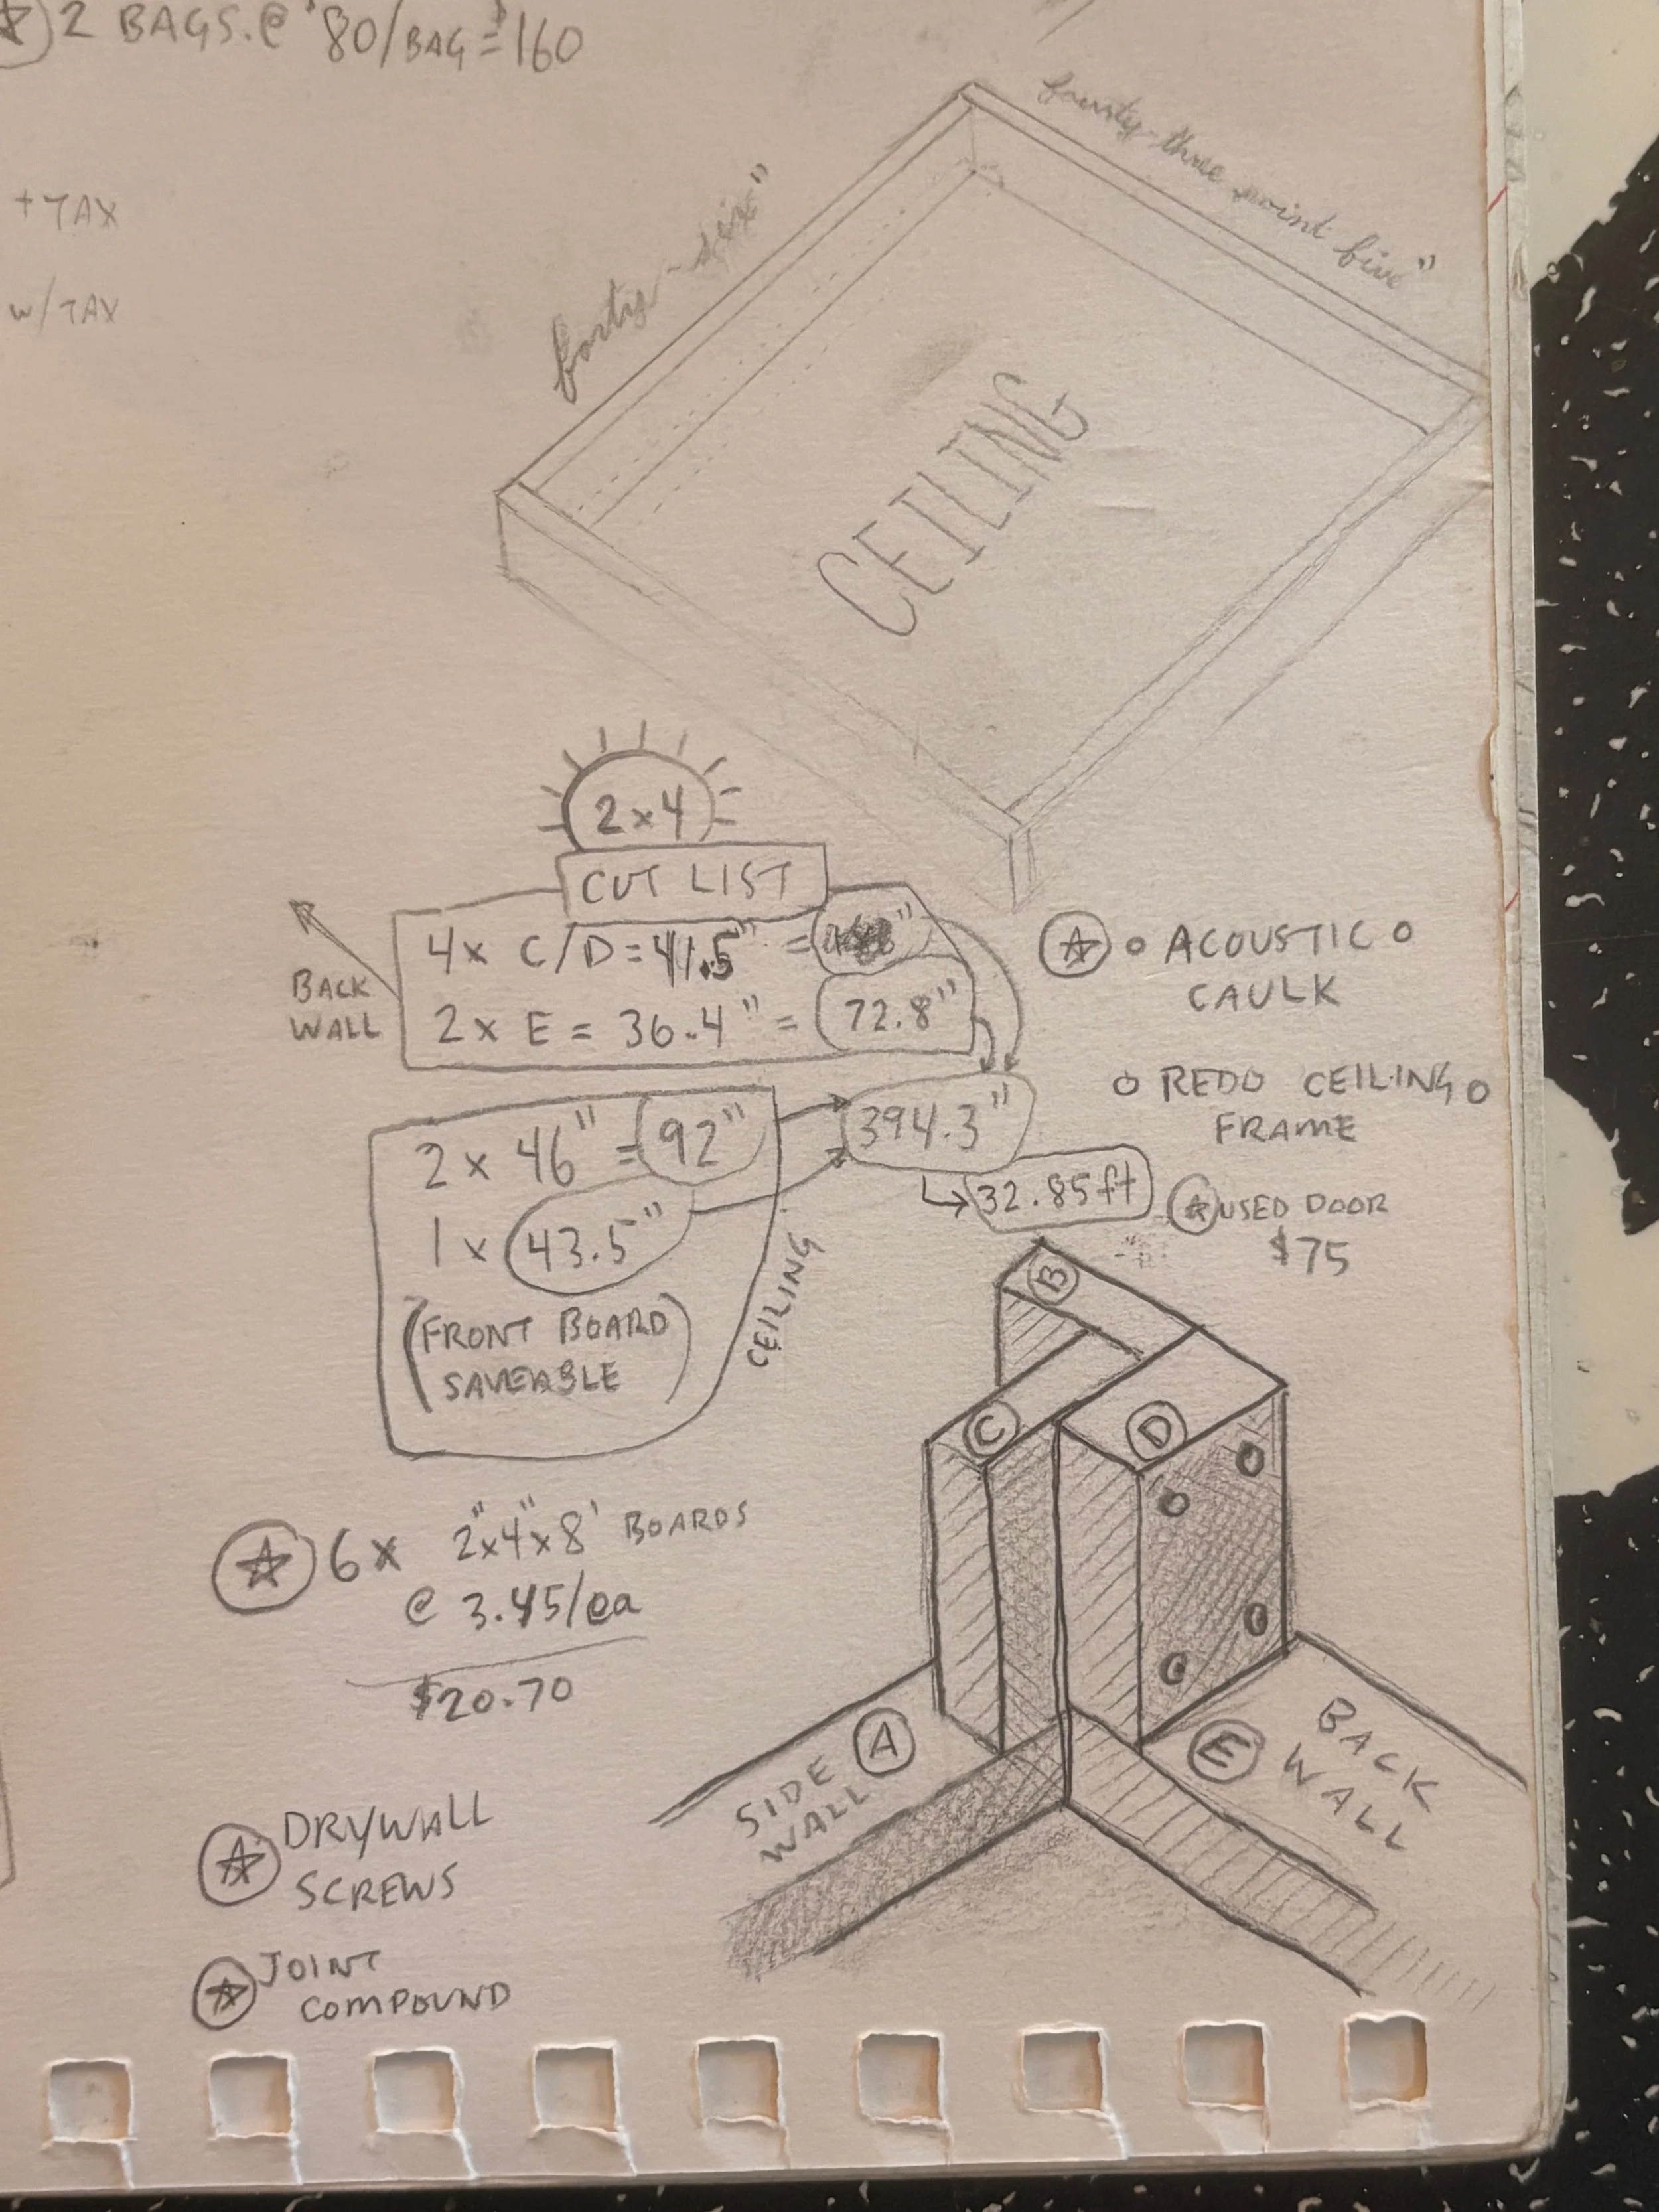
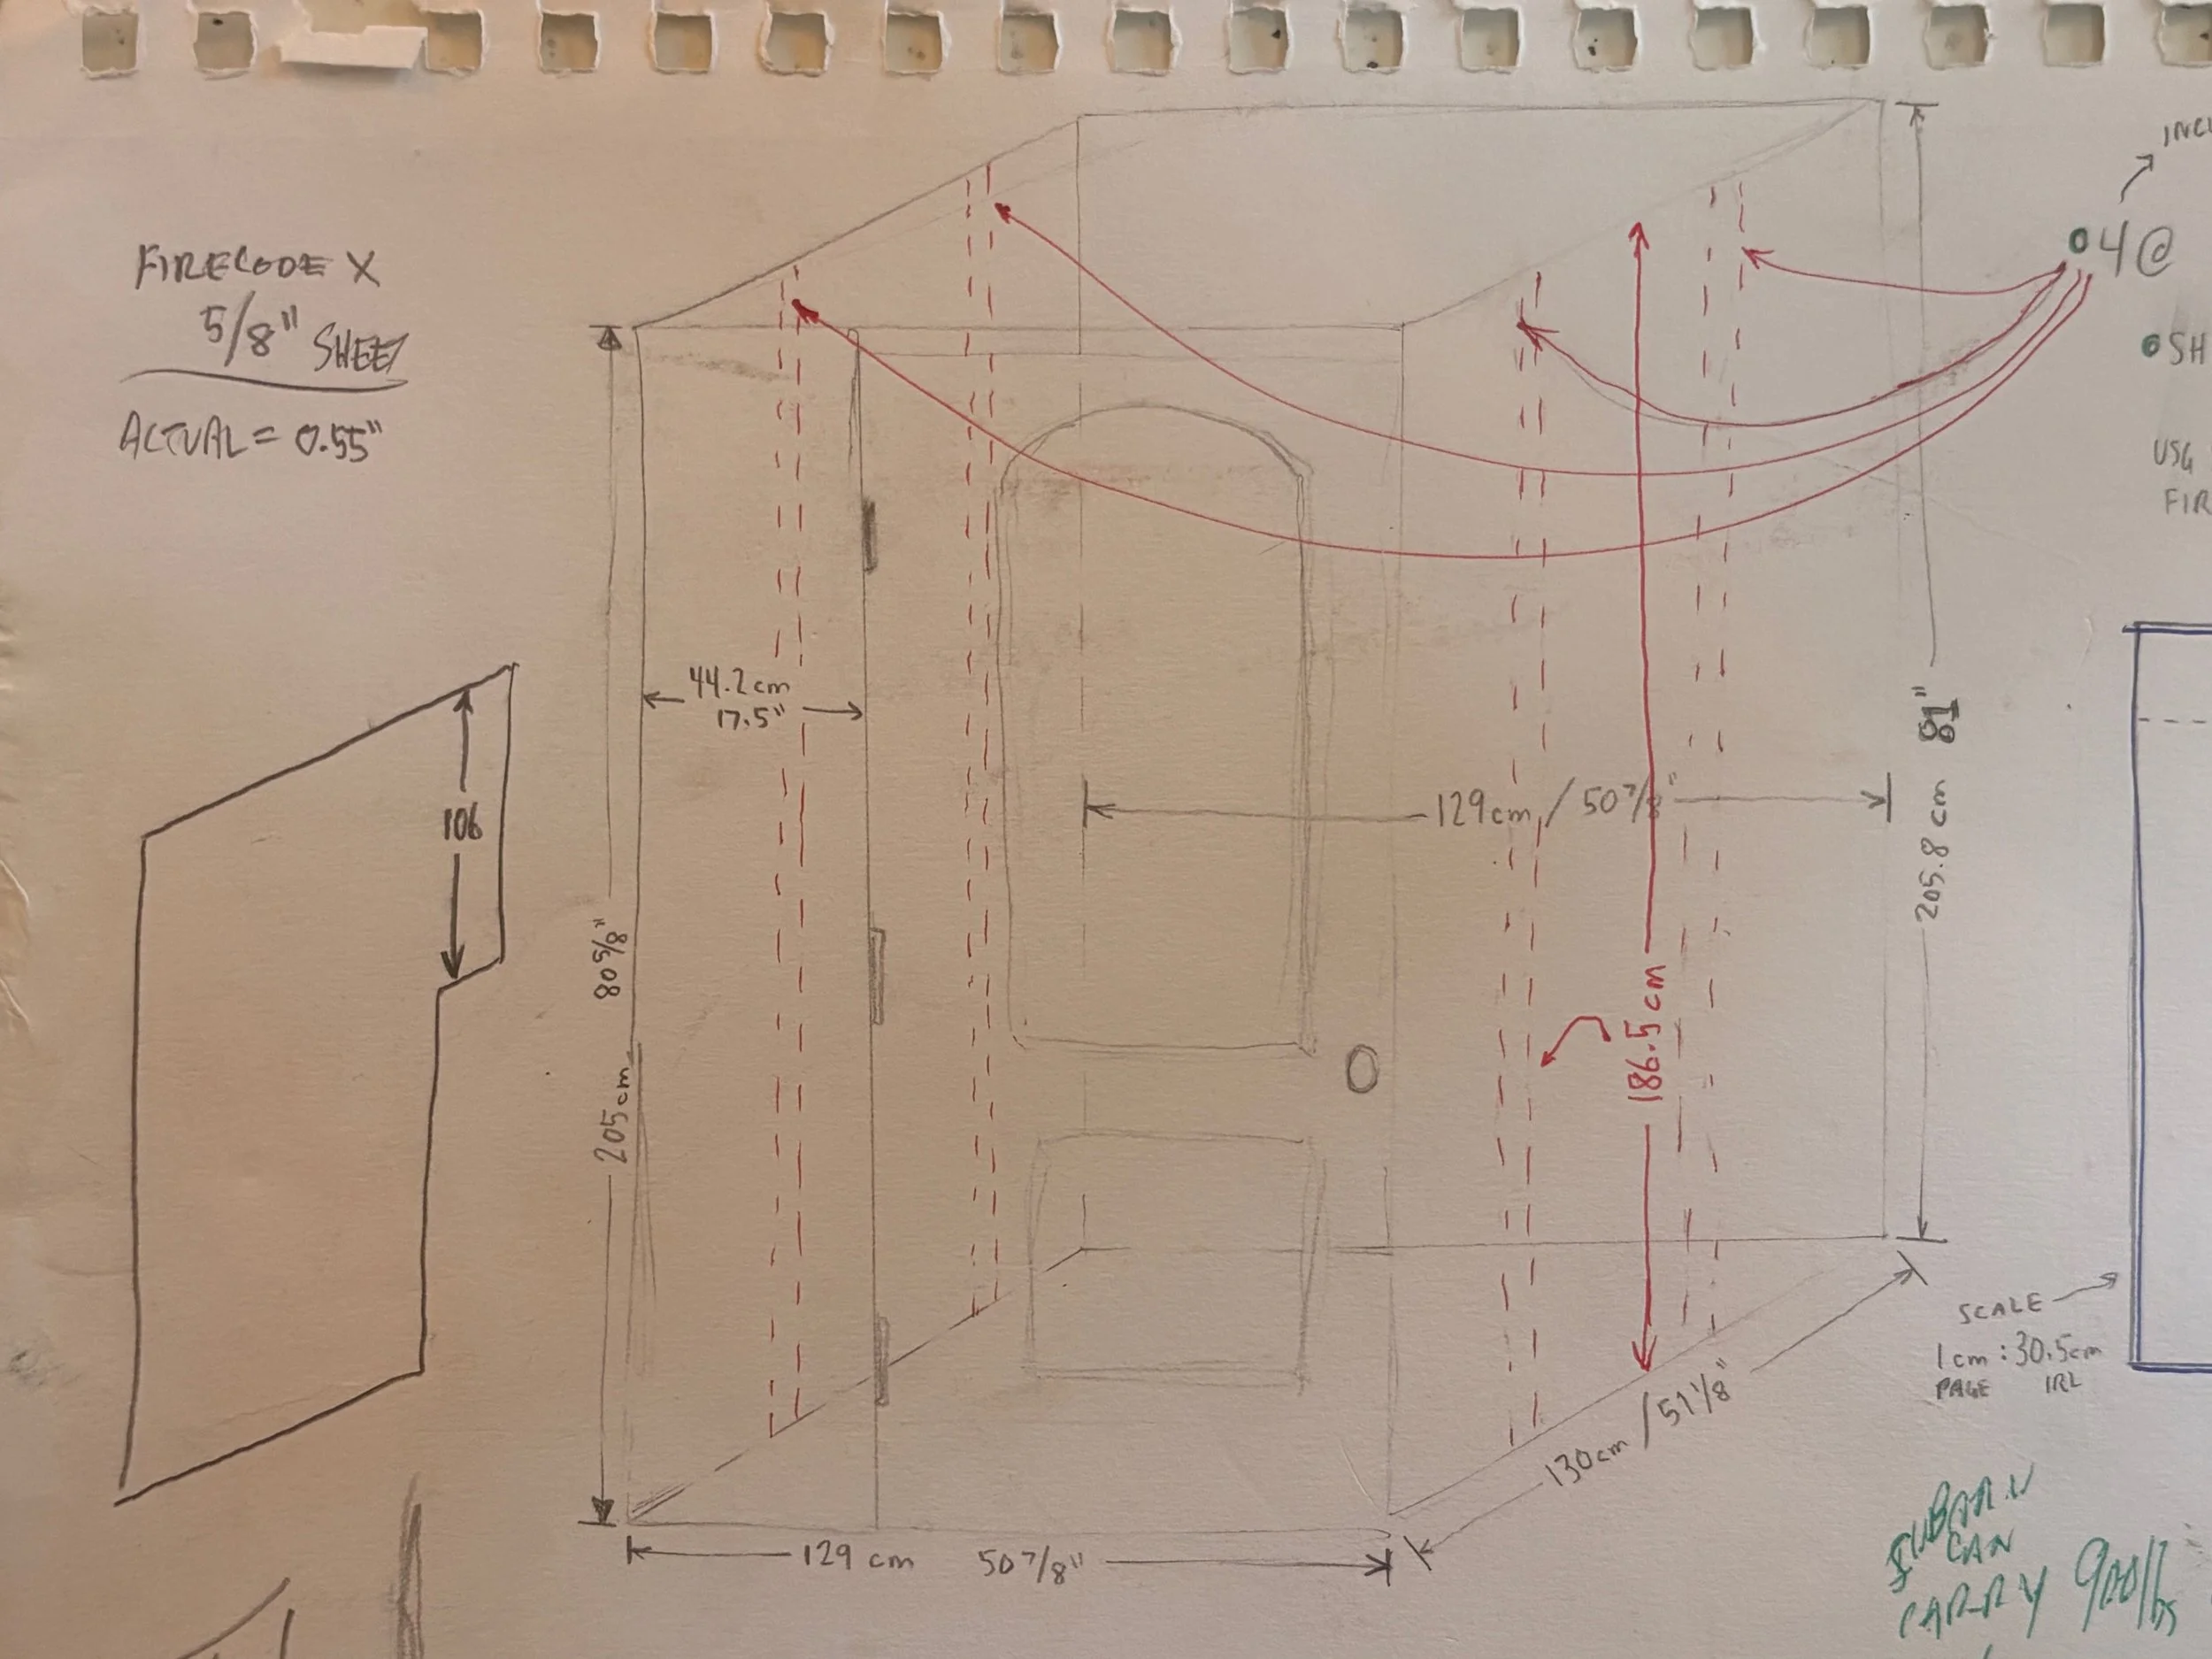
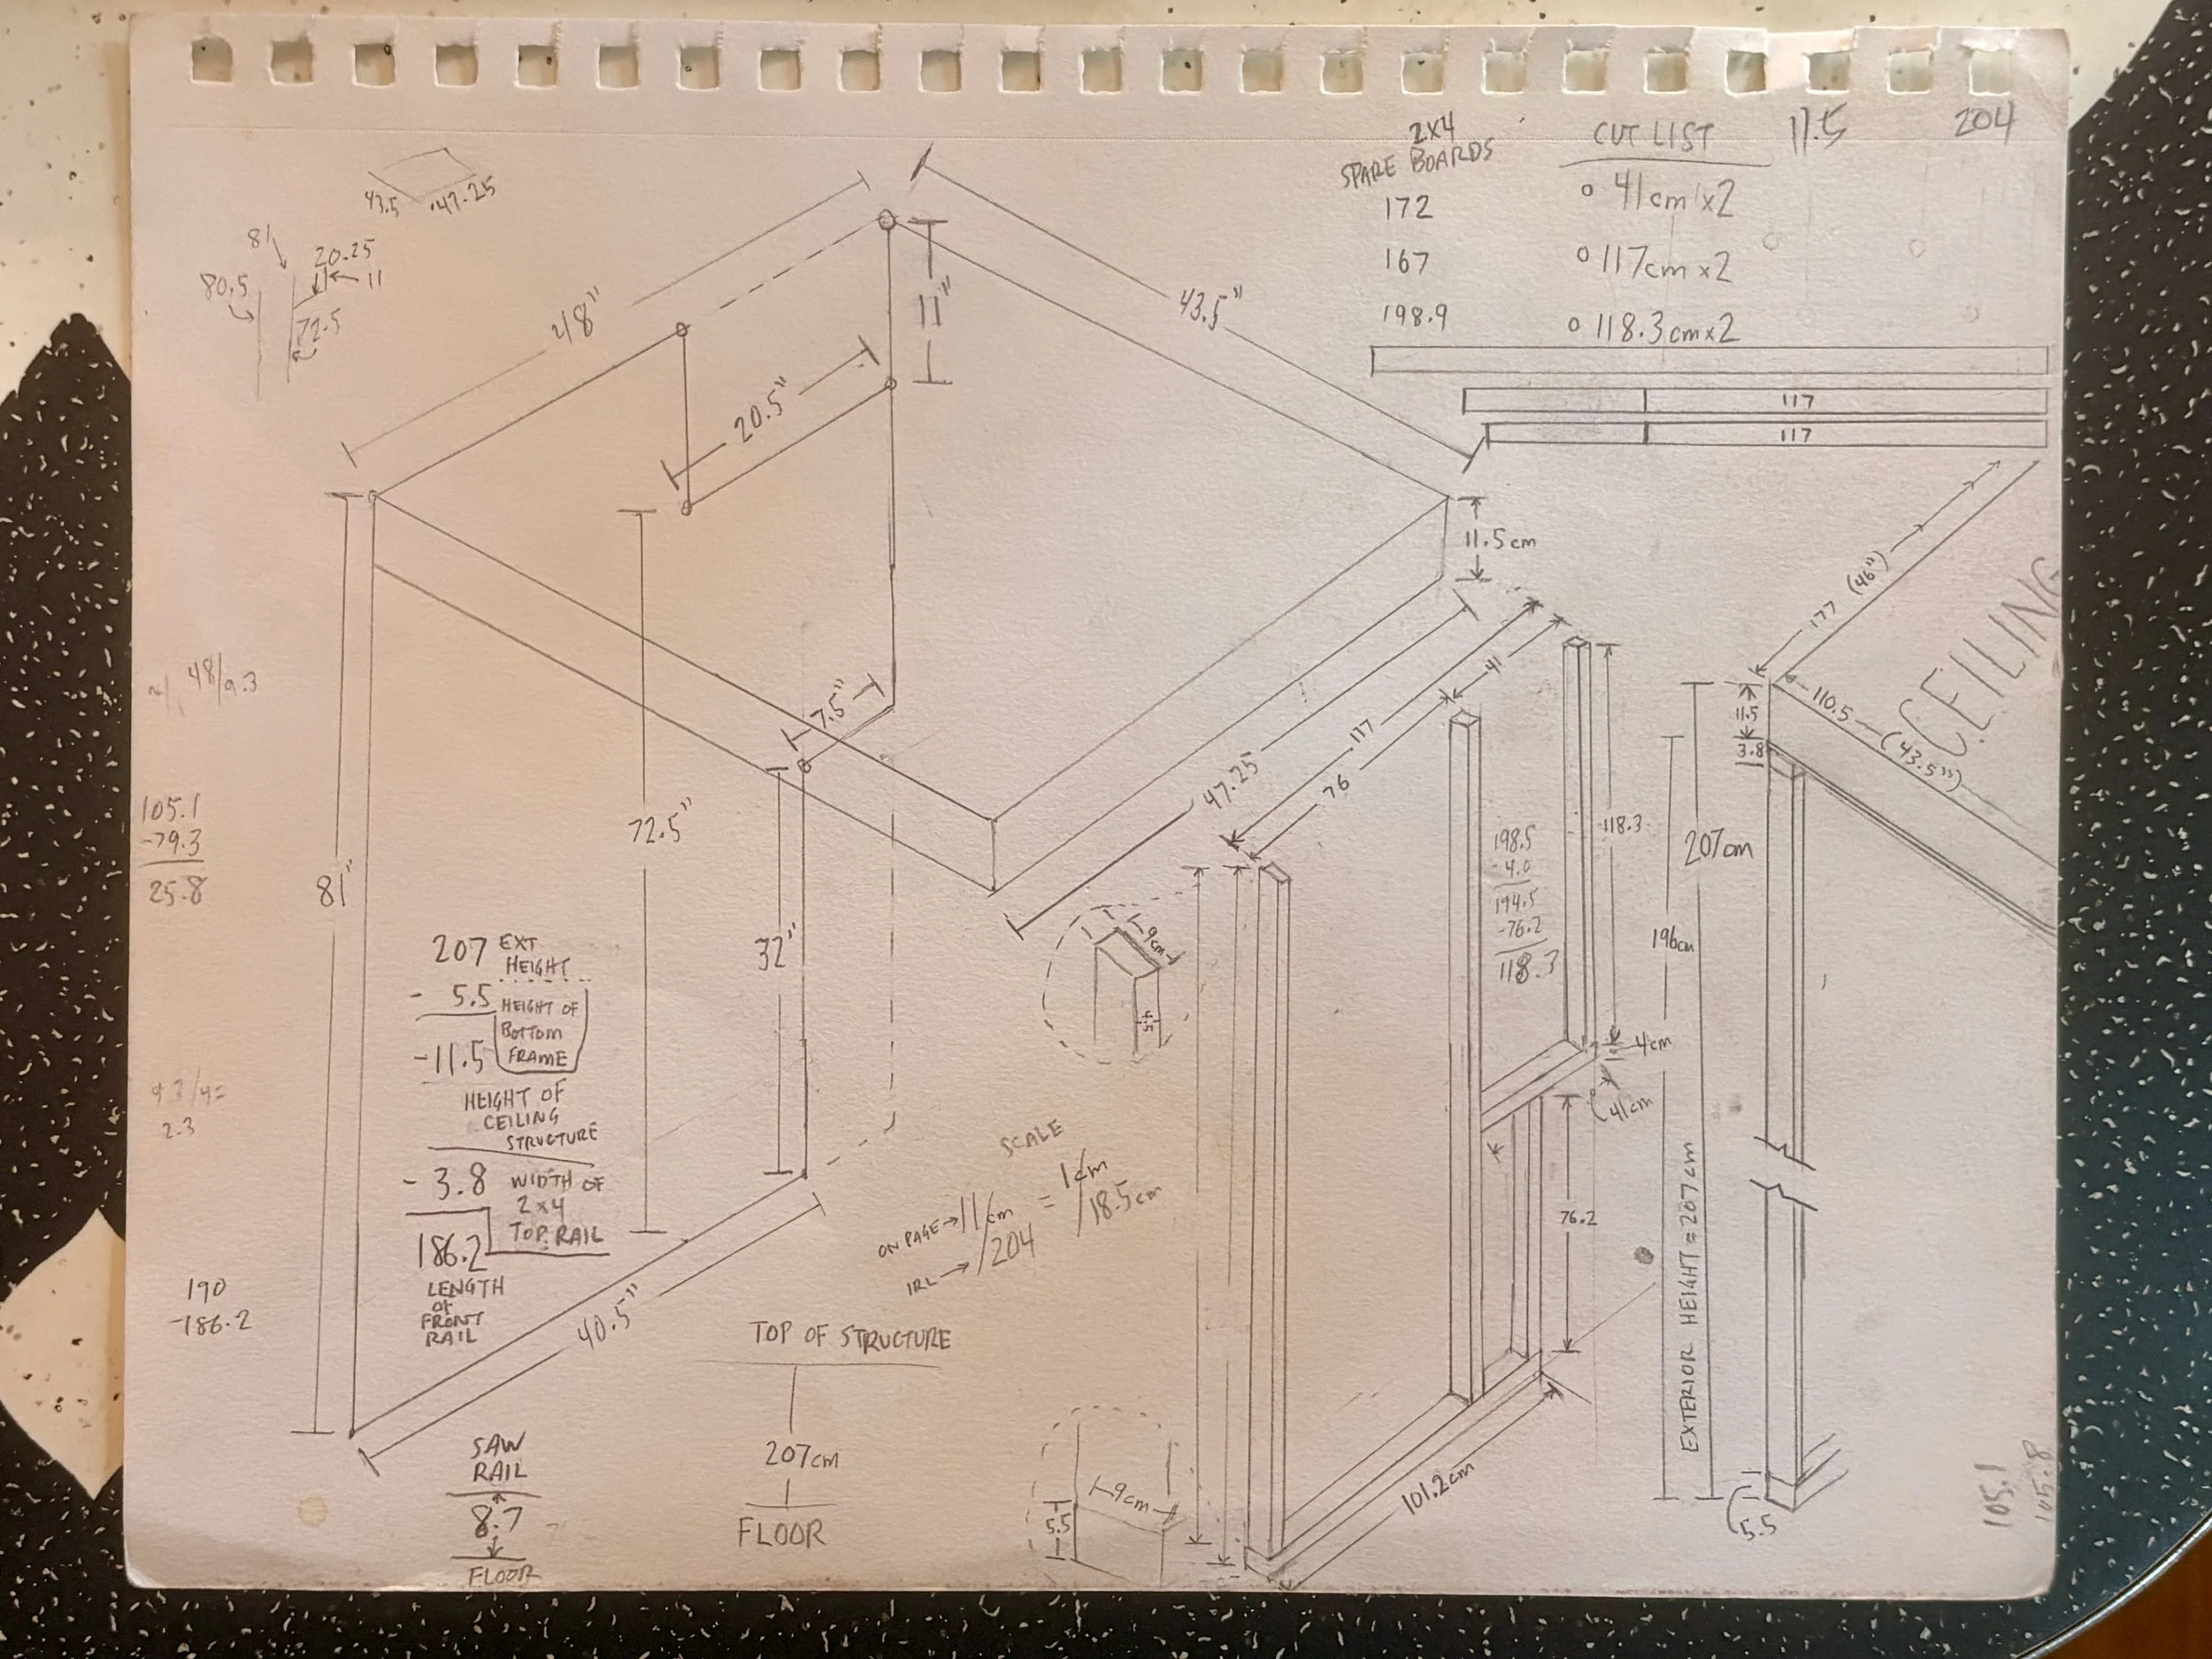
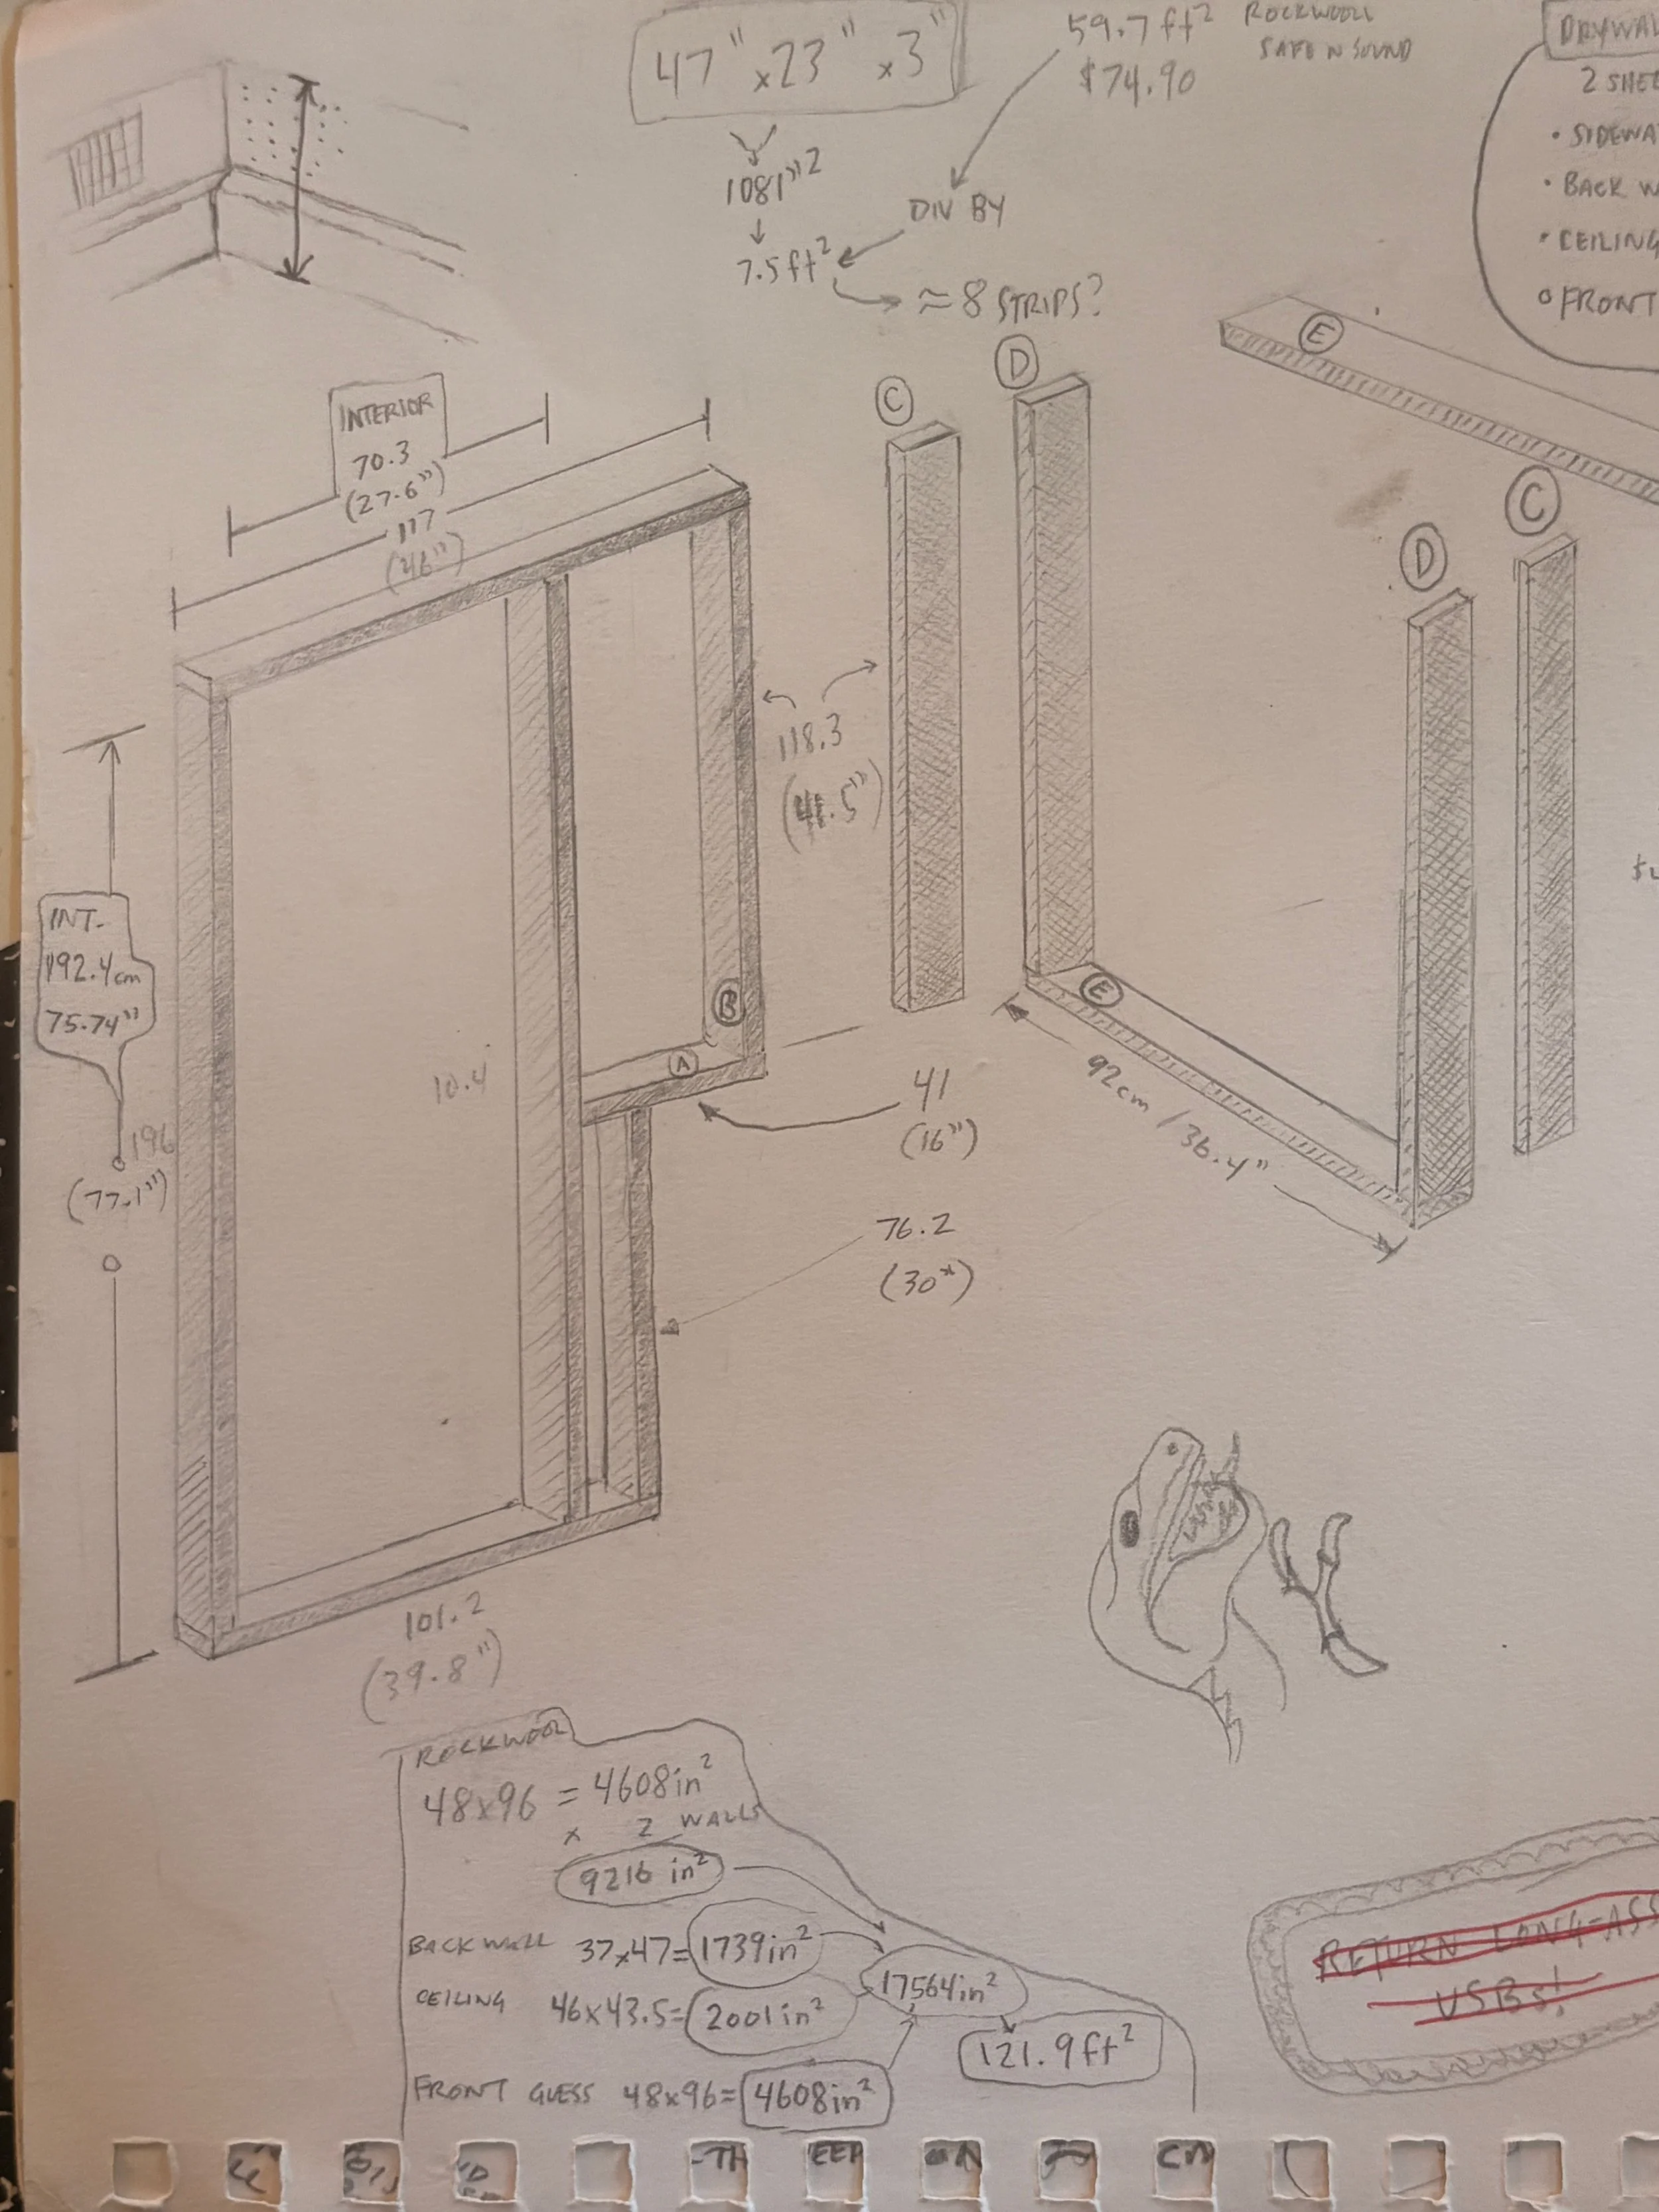
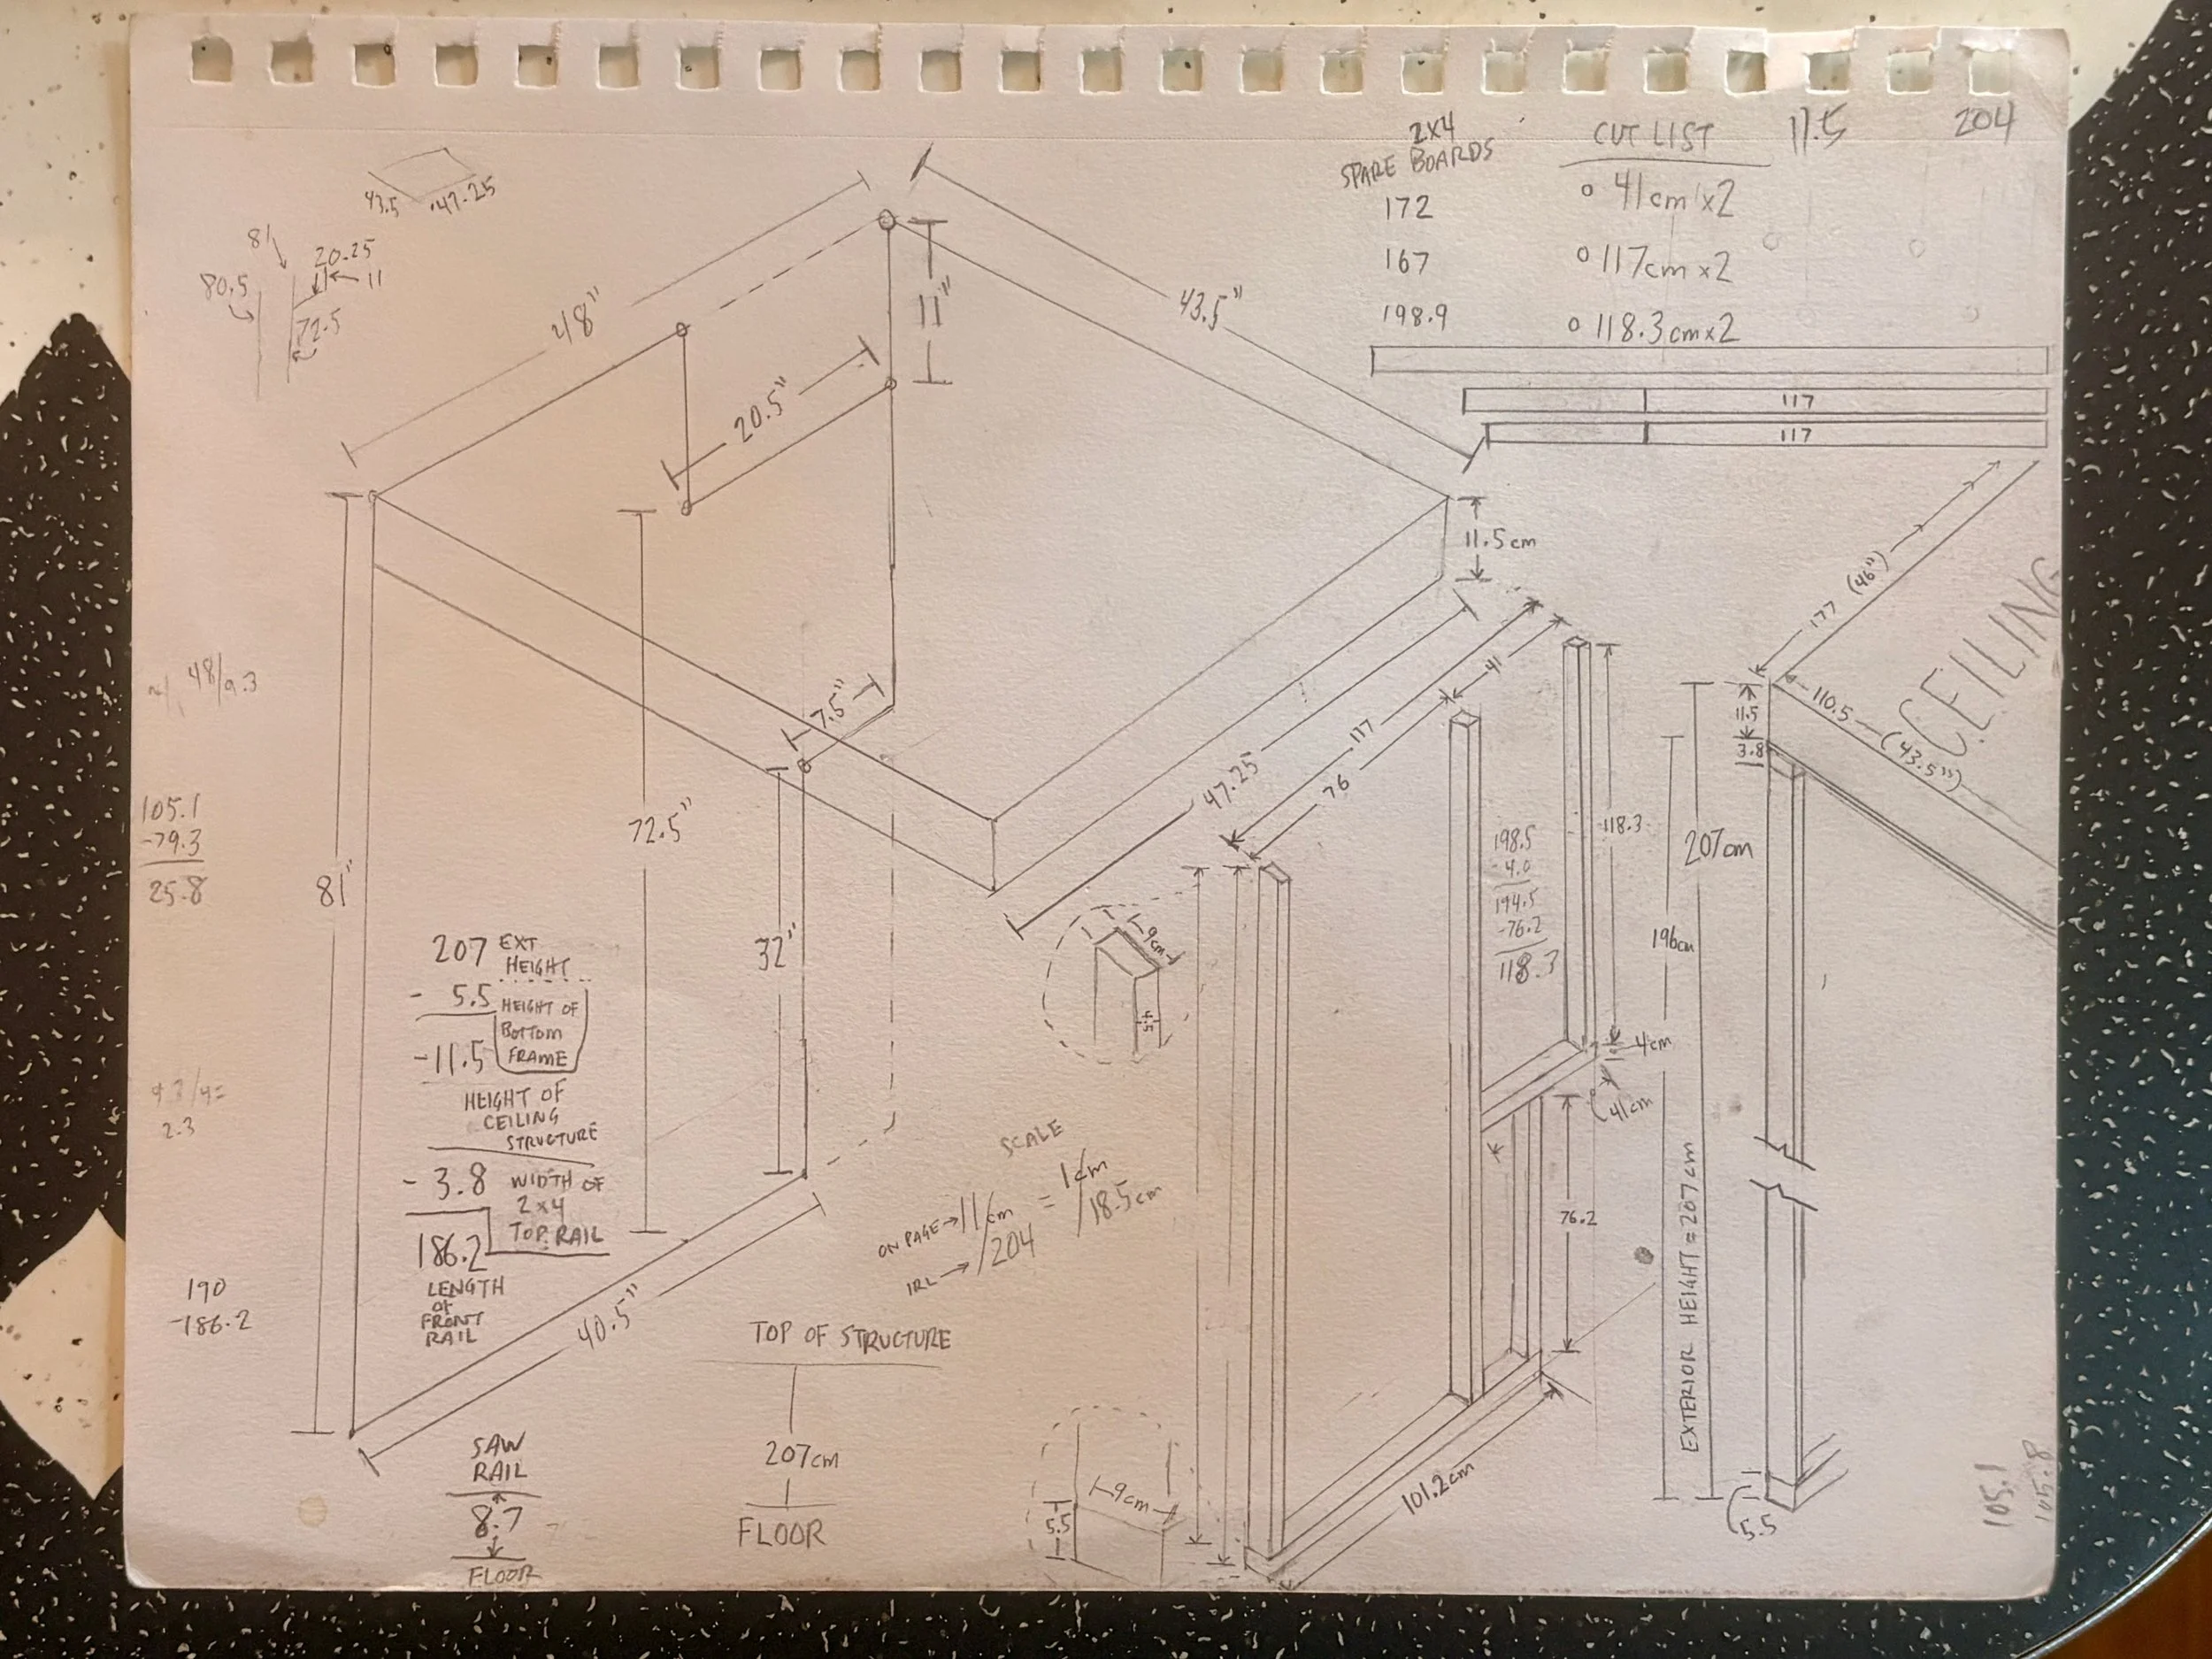
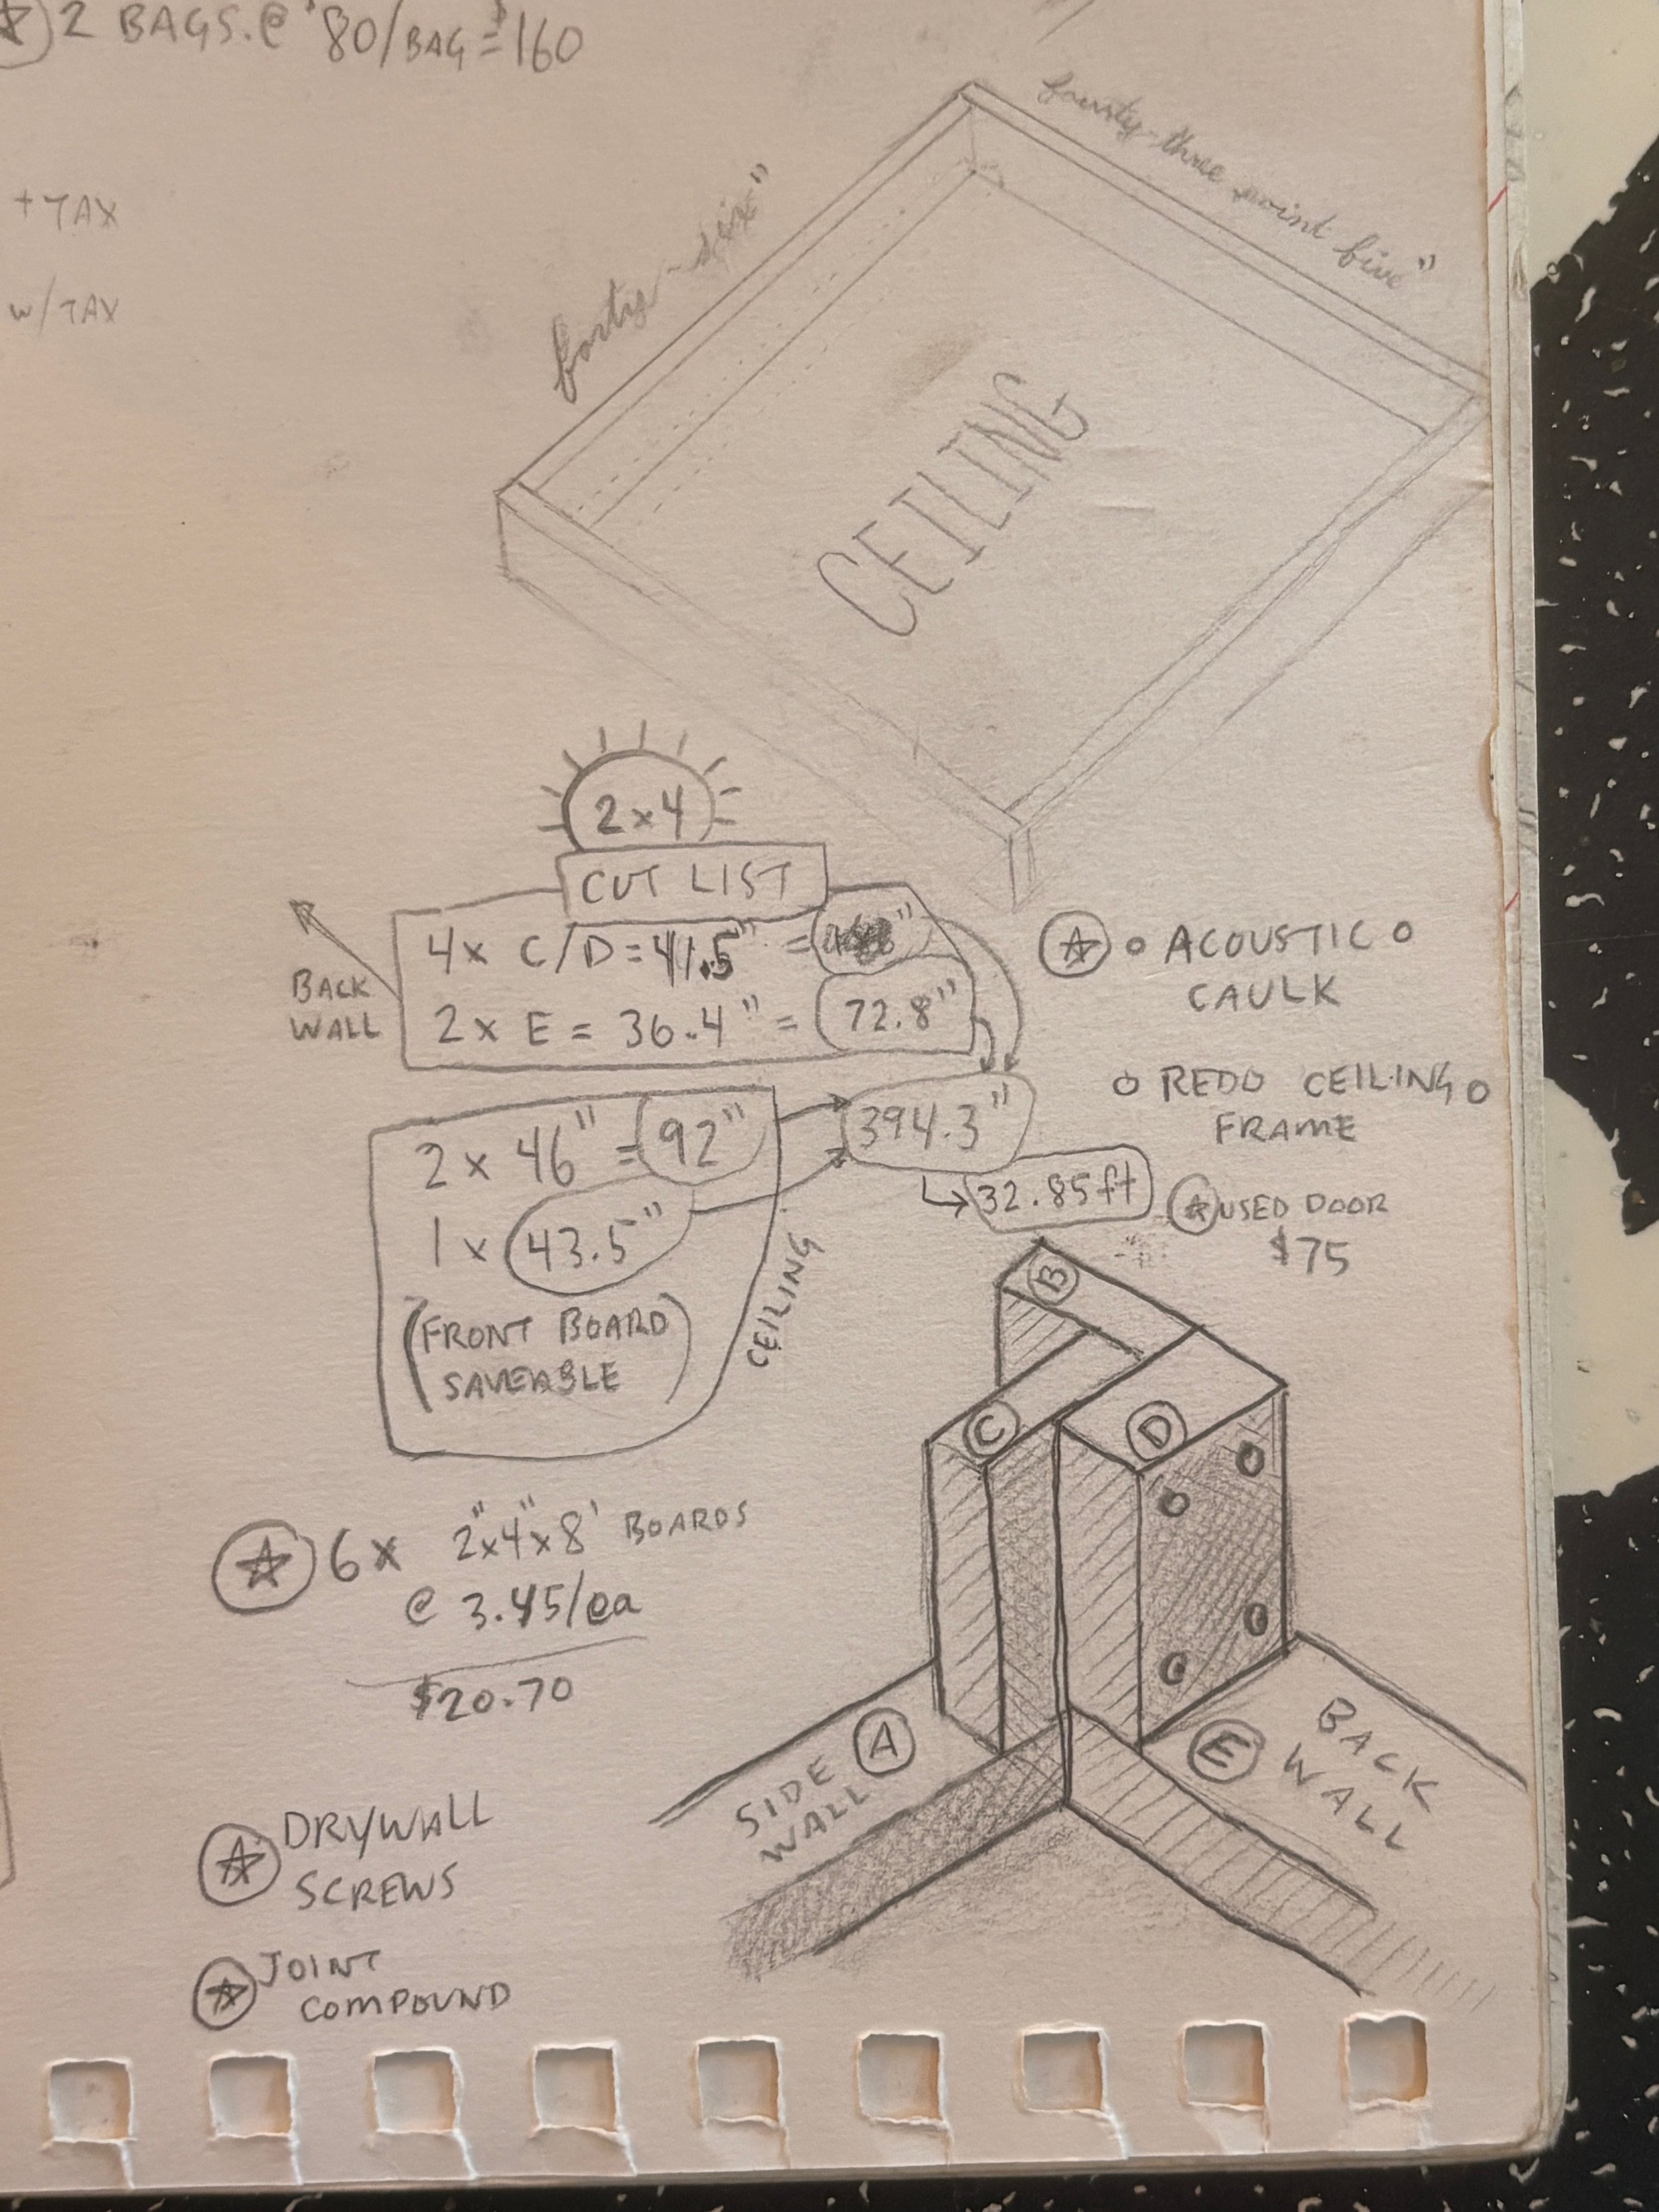
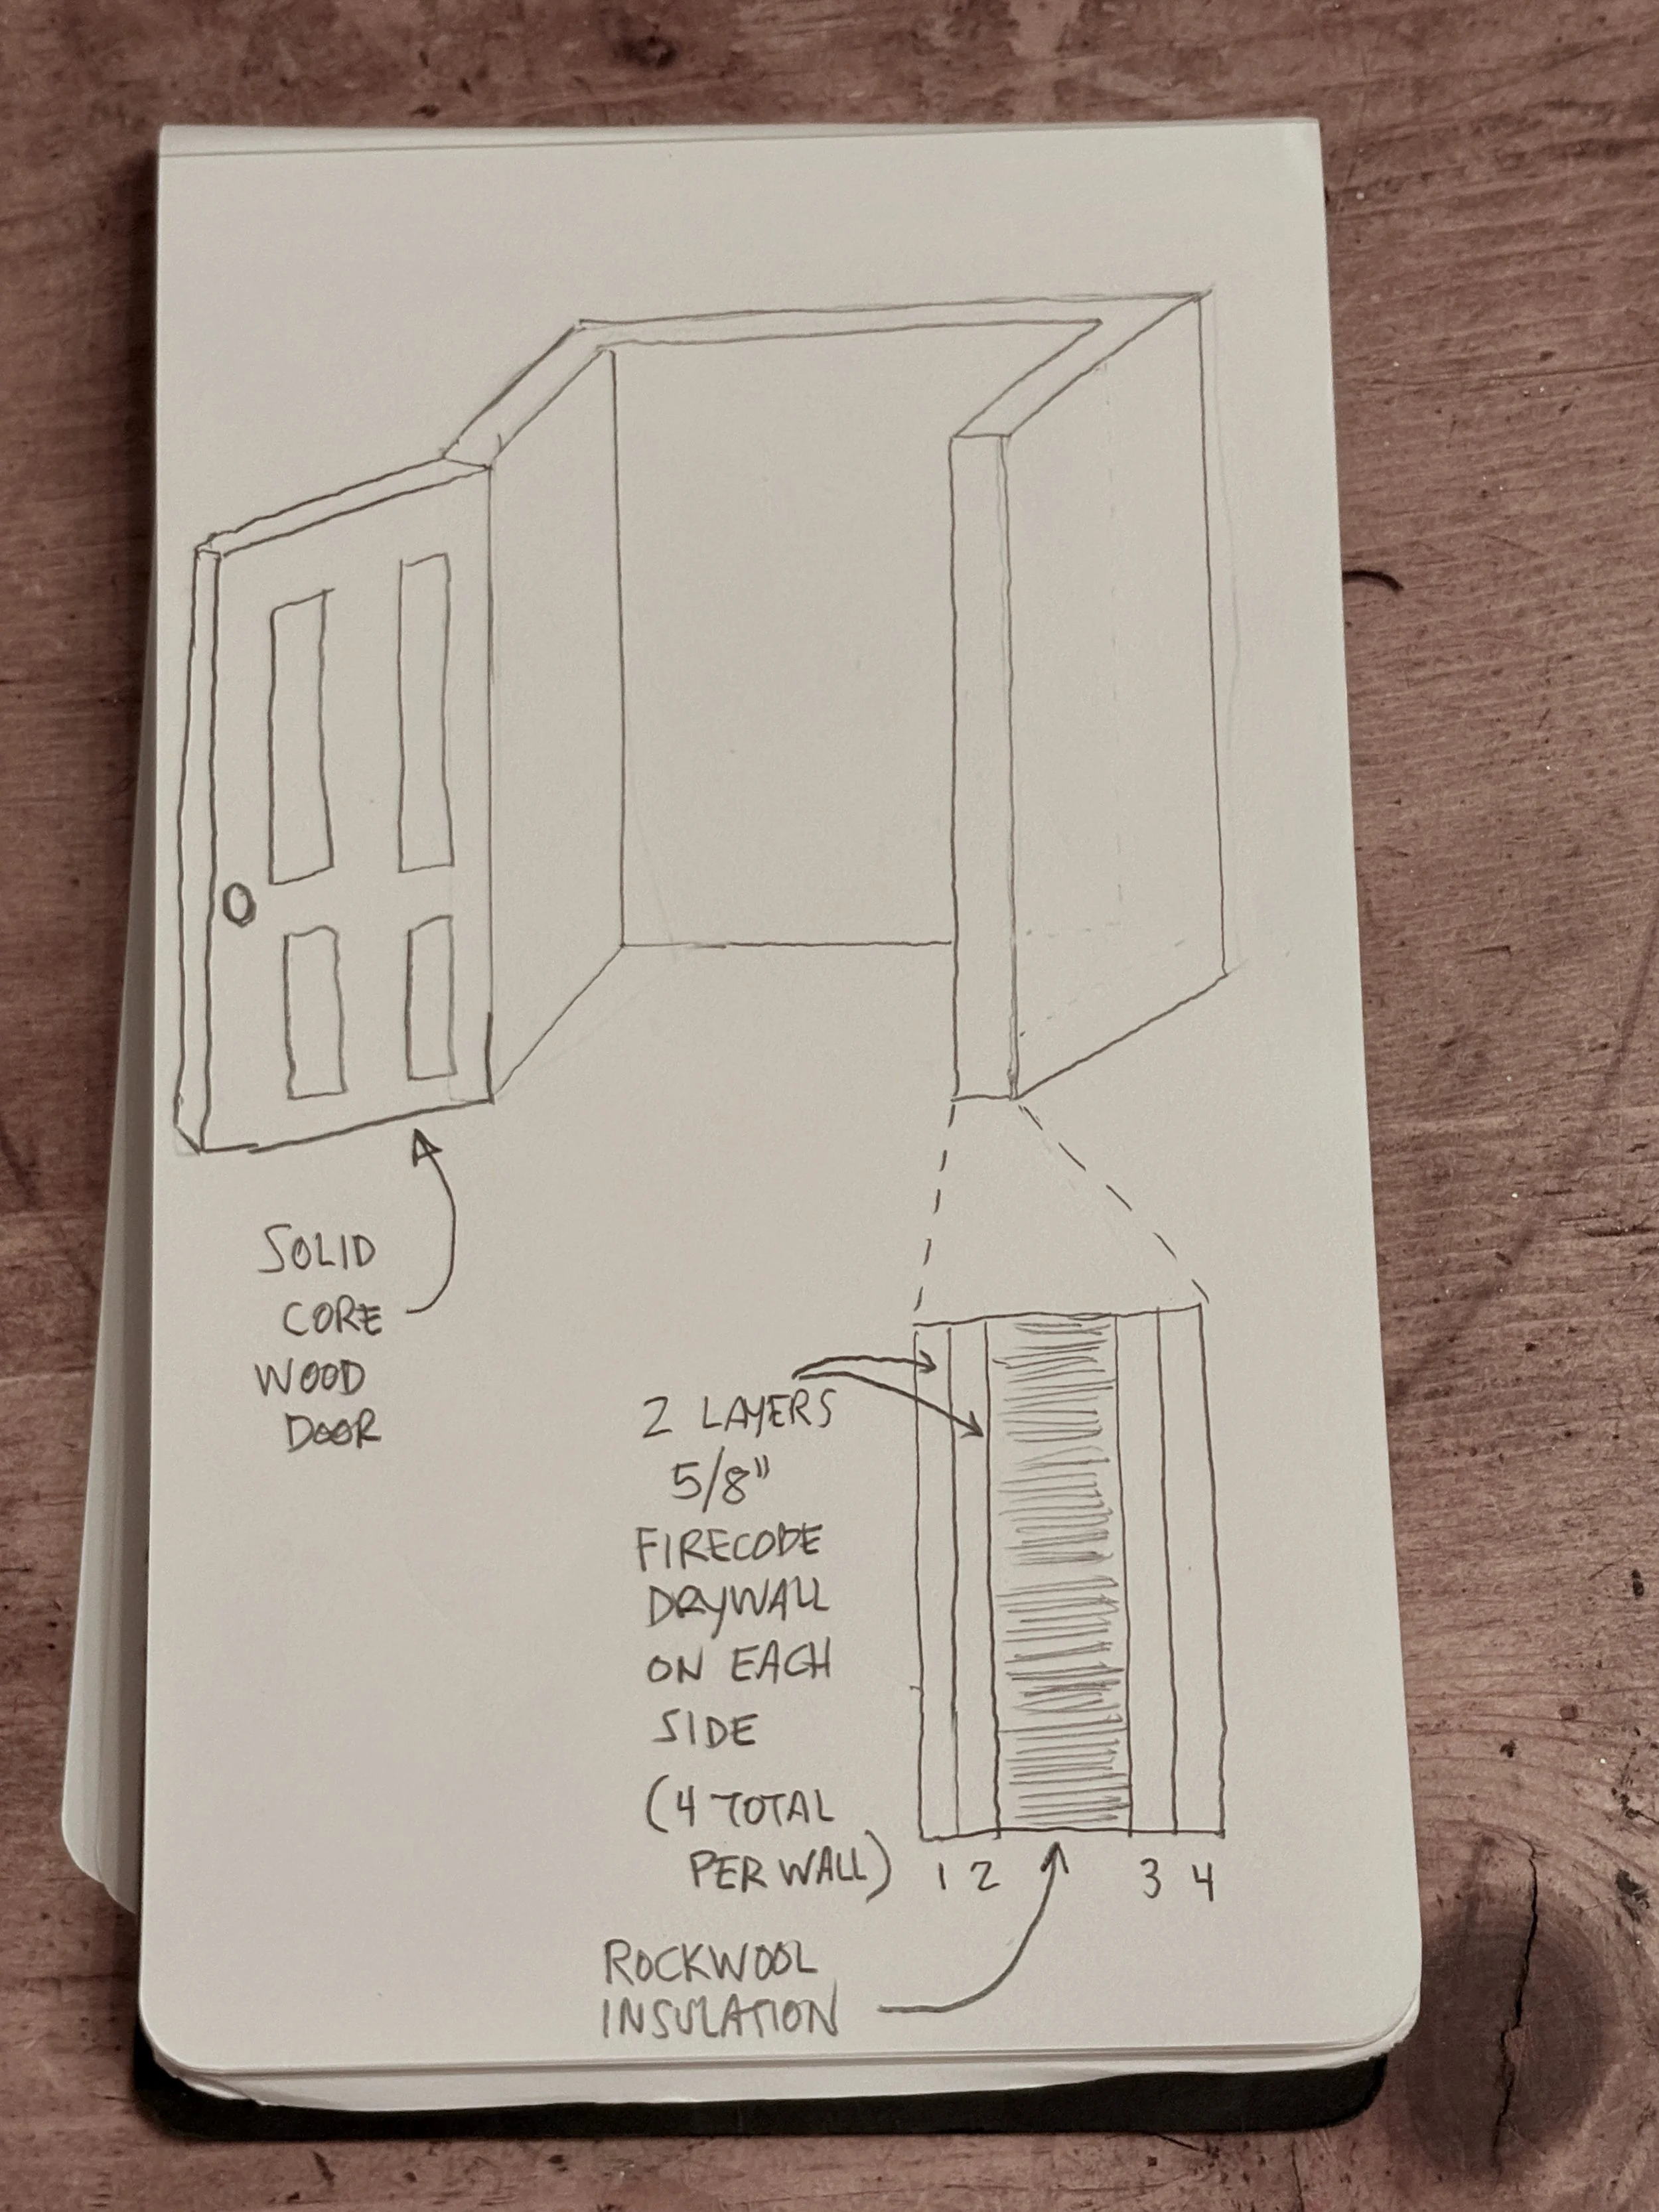
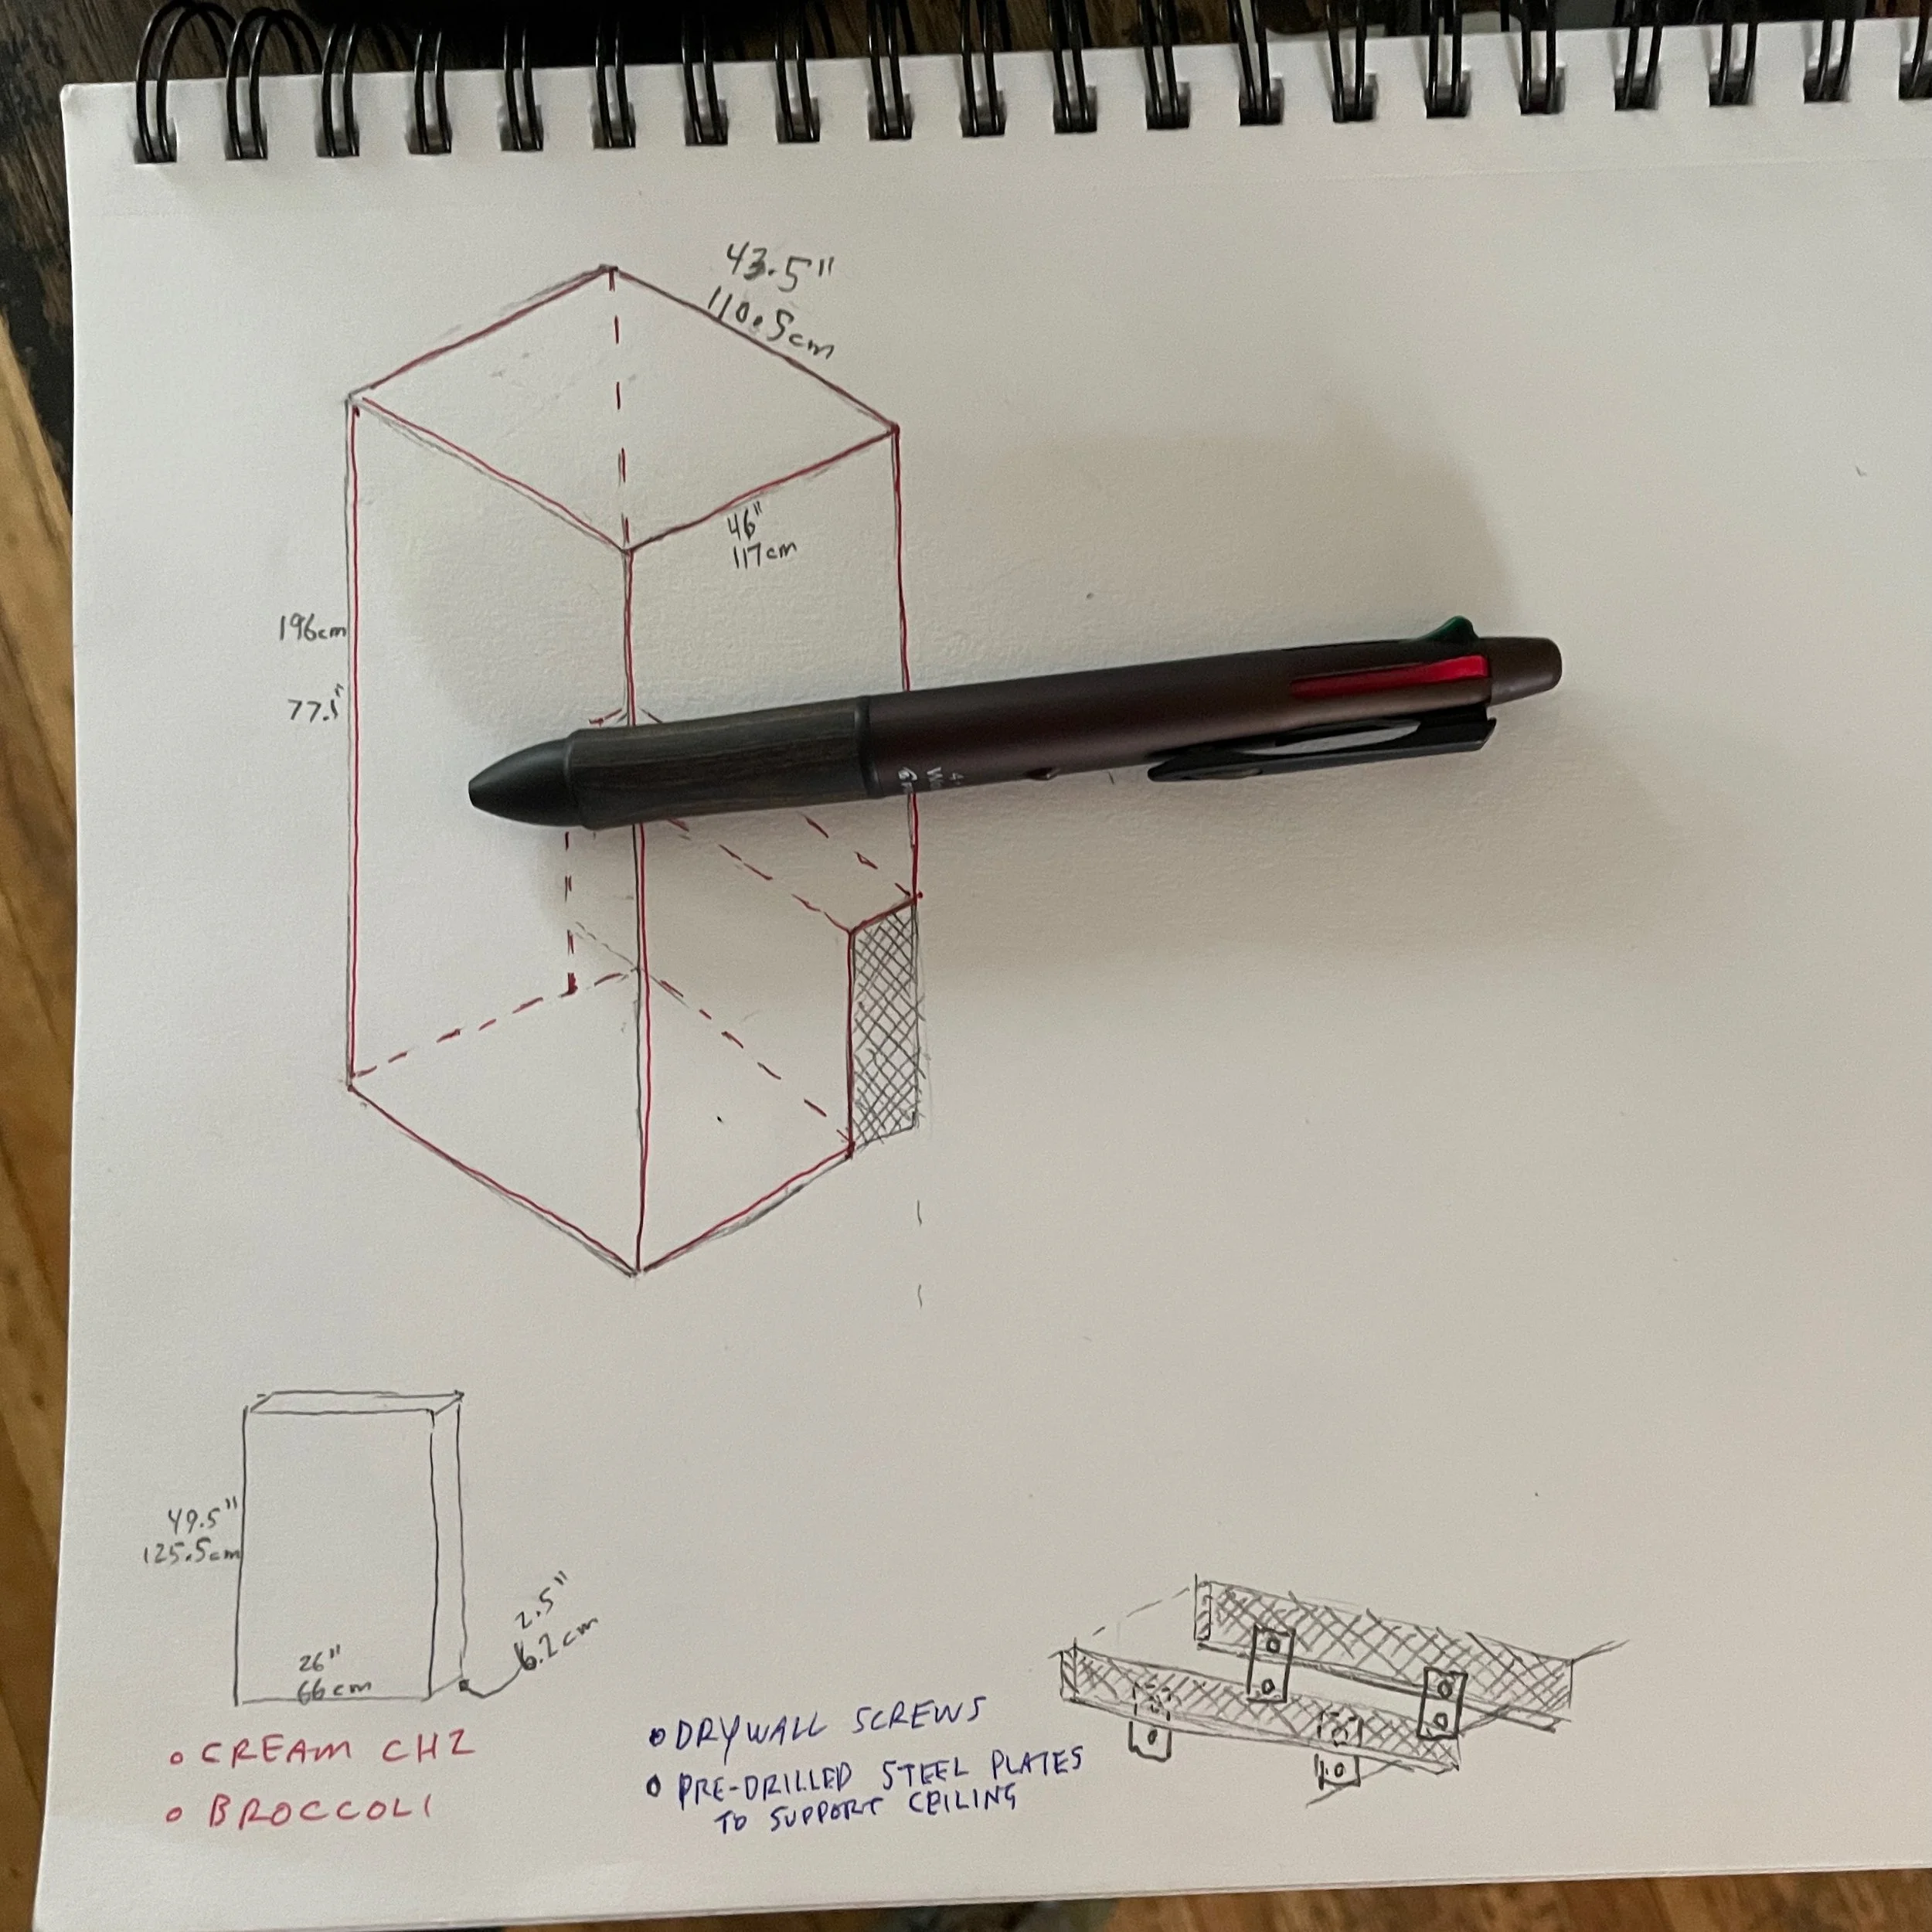
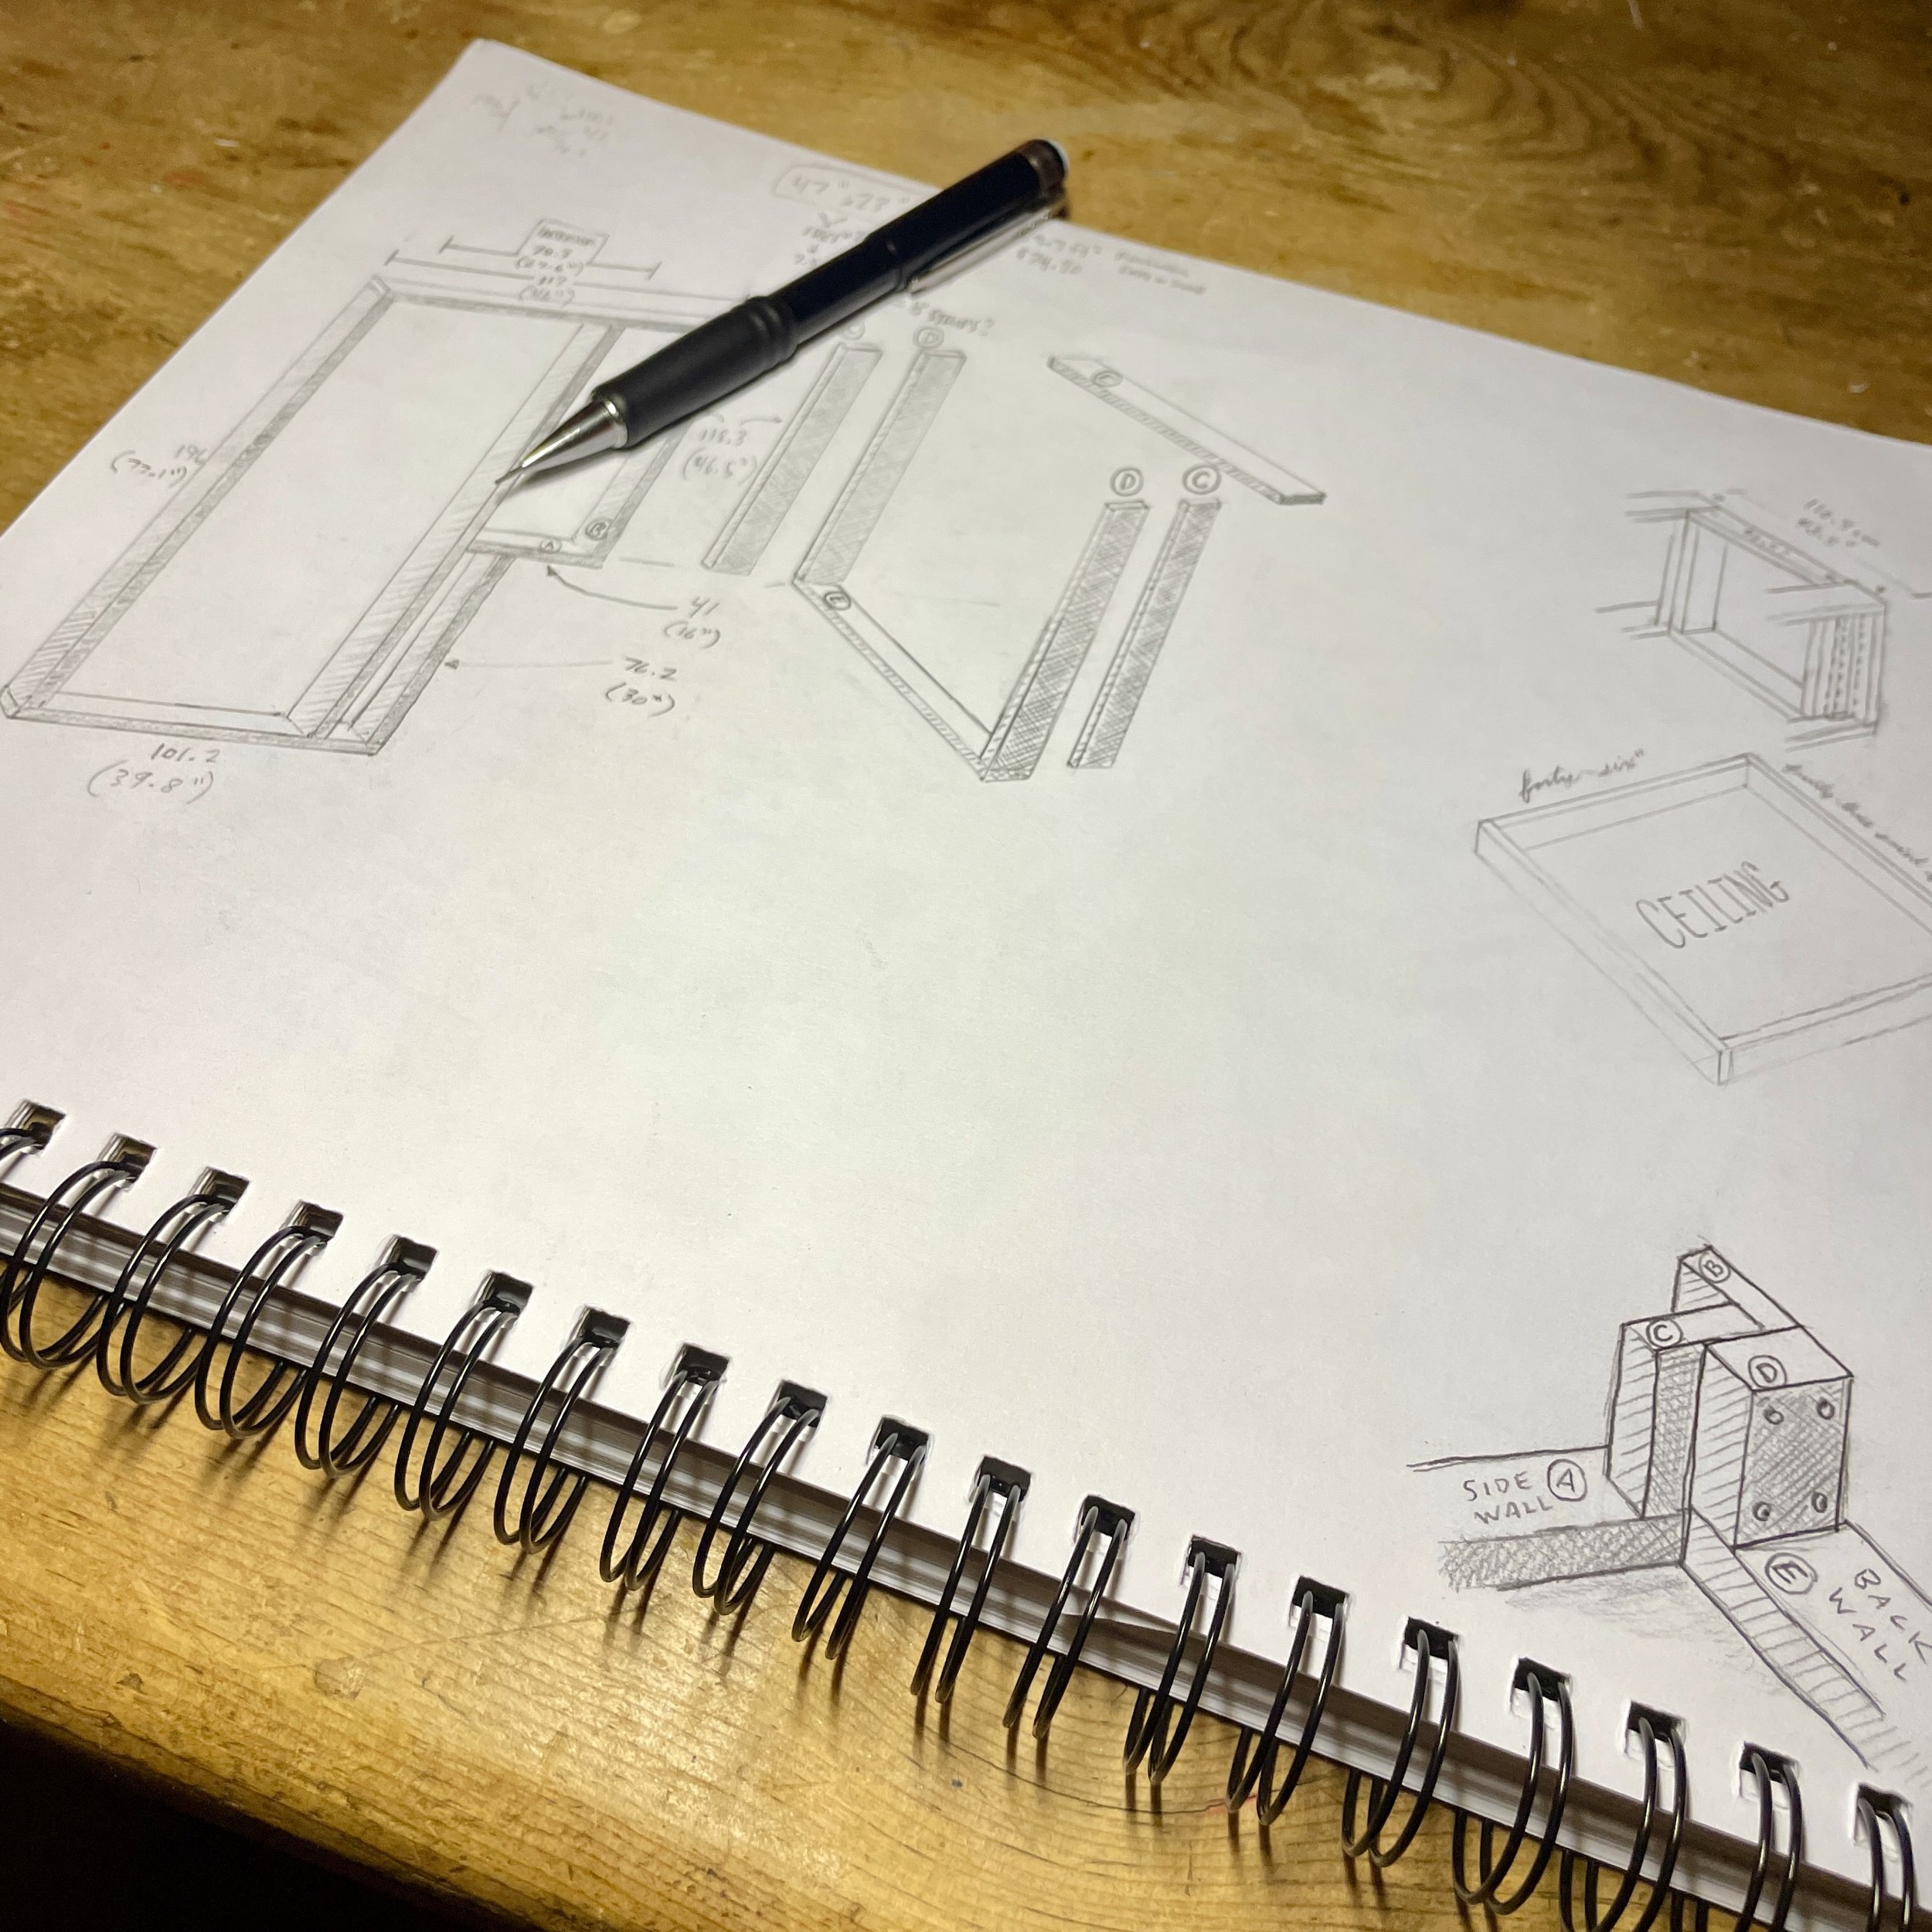
Here’s some of my drawings; please don’t base anything you do on these. I’m only including them because it makes me look like I know what I’m doing. I had been teaching myself perspective drawing and really enjoyed making these since it helped me visualize what I was doing and helped me solve problems ahead of time vs crashing into them by going in blind.
I’m terrible at math so I use metric as much as possible because I don’t have to deal with fractions. If you also suck at math, I HIGHLY recommend going metric for this reason. Home Depot sells exactly one metric tape measure which also happens to have imperial scale as well, so I love that thing.
So now I had my frame rebuilt which used the same footprint as the previous weird room because I wanted to reuse the ceiling panel that had already been built. The ceiling came off cleanly and already had several layers of drywall so I was just going to add more on top of that and call it a day. The interior space was going to be roughly 3ft x 3ft once all the drywall and foam was in there.
Def tight, but plenty good for a vocal booth project that I knew was going to be a huge improvement of my last closet booth. It would be quiet, it was standalone (no converting it back to actual-closet-mode after each use), and I was keeping the costs low by using a ton of material that I already had and construction elements that were already mostly figured out. I’m very handy, an excellent mechanic, but I am a horrible carpenter because I suck at math. It kills every one of my woodworking projects. So this was my quickest and cheapest way into a professional booth.
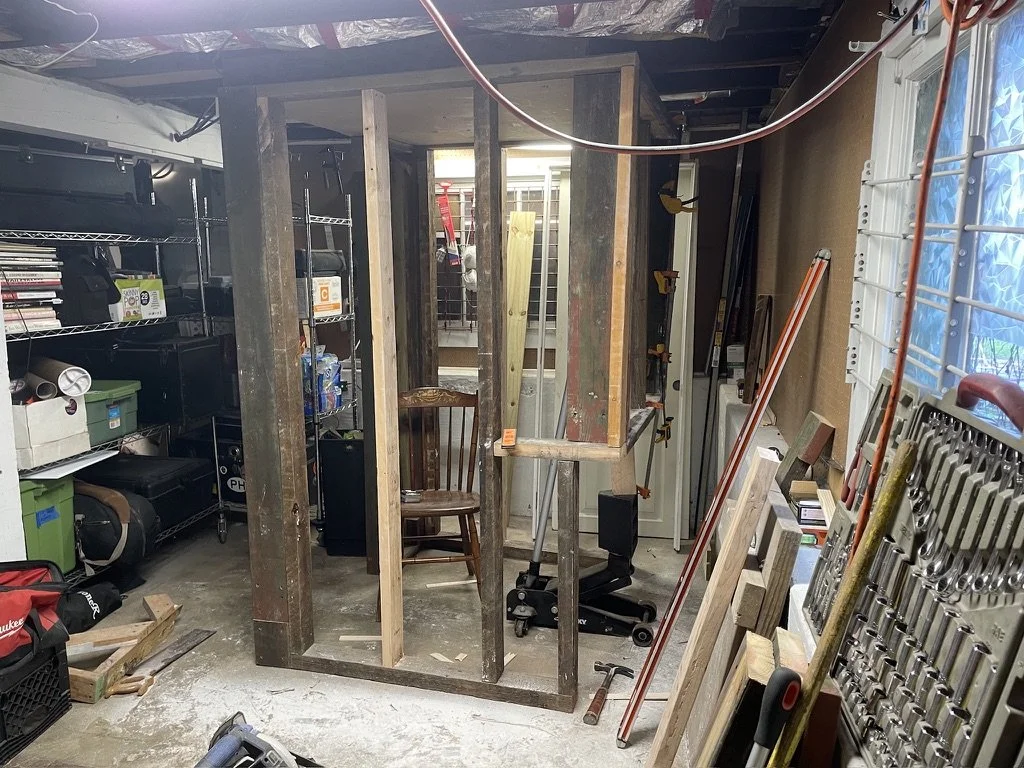
Framing done.
Here’s a photo of the frame just before I secured it in place. You’ll see that a bunch of the material from the existing frame are old pieces of lumber that the previous owner must’ve pilfered from other building projects of yore. They are the very dense 2x4’s that are actually 2in x 4in, with squared-off edges. At the time, I thought it was pretty cool that I was continuing to upcycle these materials. More on this later.
Behind the frame you can see the white door and door frame that I found on Facebook Marketplace for like $30. Excellent find. I ended up seeing a ton of stuff like this from contractors salvaging materials that ordinarily would just be tossed in a dumpster because it’s not worth the GC’s time to salvage and resell. But the guys swinging the hammers know that they can get easy cash for that stuff, so def check your local resale postings for materials. The guy I bought my door from had a garage full of salvage building material and I was able to pick through what he had to find the door I liked best.
Once the frame was rebuilt and secured to the house, I started attaching the door frame and door. I had never hung a door before and it was probably one of the hardest things I’ve ever done. Again, math. :( Not only did it need to fit properly, it had to swing and latch and sit close to the ground to mitigate the air gap. My lord was that hard.
BUT— everything from there on went pretty quickly, but not because I’m great at any of this. I purchased all the drywall and started cutting and fastening that to the frame. Then life happened.
We were in the middle of a huge construction project where we had to demolish the bedrooms my family and I lived in. We were sleeping all over the house while the project trudged on with the construction crew. My wife and I were sleeping in the dining room, my daughter was in a small breezeway office space without a door, and my son was living in the unfinished basement. We also decided during the remodeling that my wife and I were going to remove a ton of cloth wiring from the first floor walls and rewire the ceilings and switches in three rooms. So basically every part of the house except the kitchen was a construction zone. And I still had to work my full-time freelance gig and all other parts of life with kids.
I wanted the booth done and it was taking forever because I could only devote small pieces of time to it on the nights and weekends. I decided to bite the bullet and hire in some help who knew what they were doing and could finish off the project quickly.
Now that the concepting and figuring things out, and framing was all done, it was just a matter of putting all the remaining pieces in place so it was pretty straightforward and easy to delegate. I ended up hiring one guy from Task Rabbit who was just OK, and then I learned my good friend who’s an electrician and general DIY wizard was looking for some side-work so I hired him to finish everything off.
Once my buddy was in there, things went super fast because he’s an actual contractor and does this type of stuff all the time and has way more building experience than I do. He whipped in the remainder of the drywall, put in the Rockwool, caulked everything up, and mudded/taped the interior and exterior walls of the booth. He did all of this in like 6 hours. It would have taken me over a month, easily. I didn’t like the idea of shelling out cash for labor since I’d made it this far on my own, and the cost of materials thus far was way lower than I thought, but I’m glad that cash went to a good friend who was needing the work.
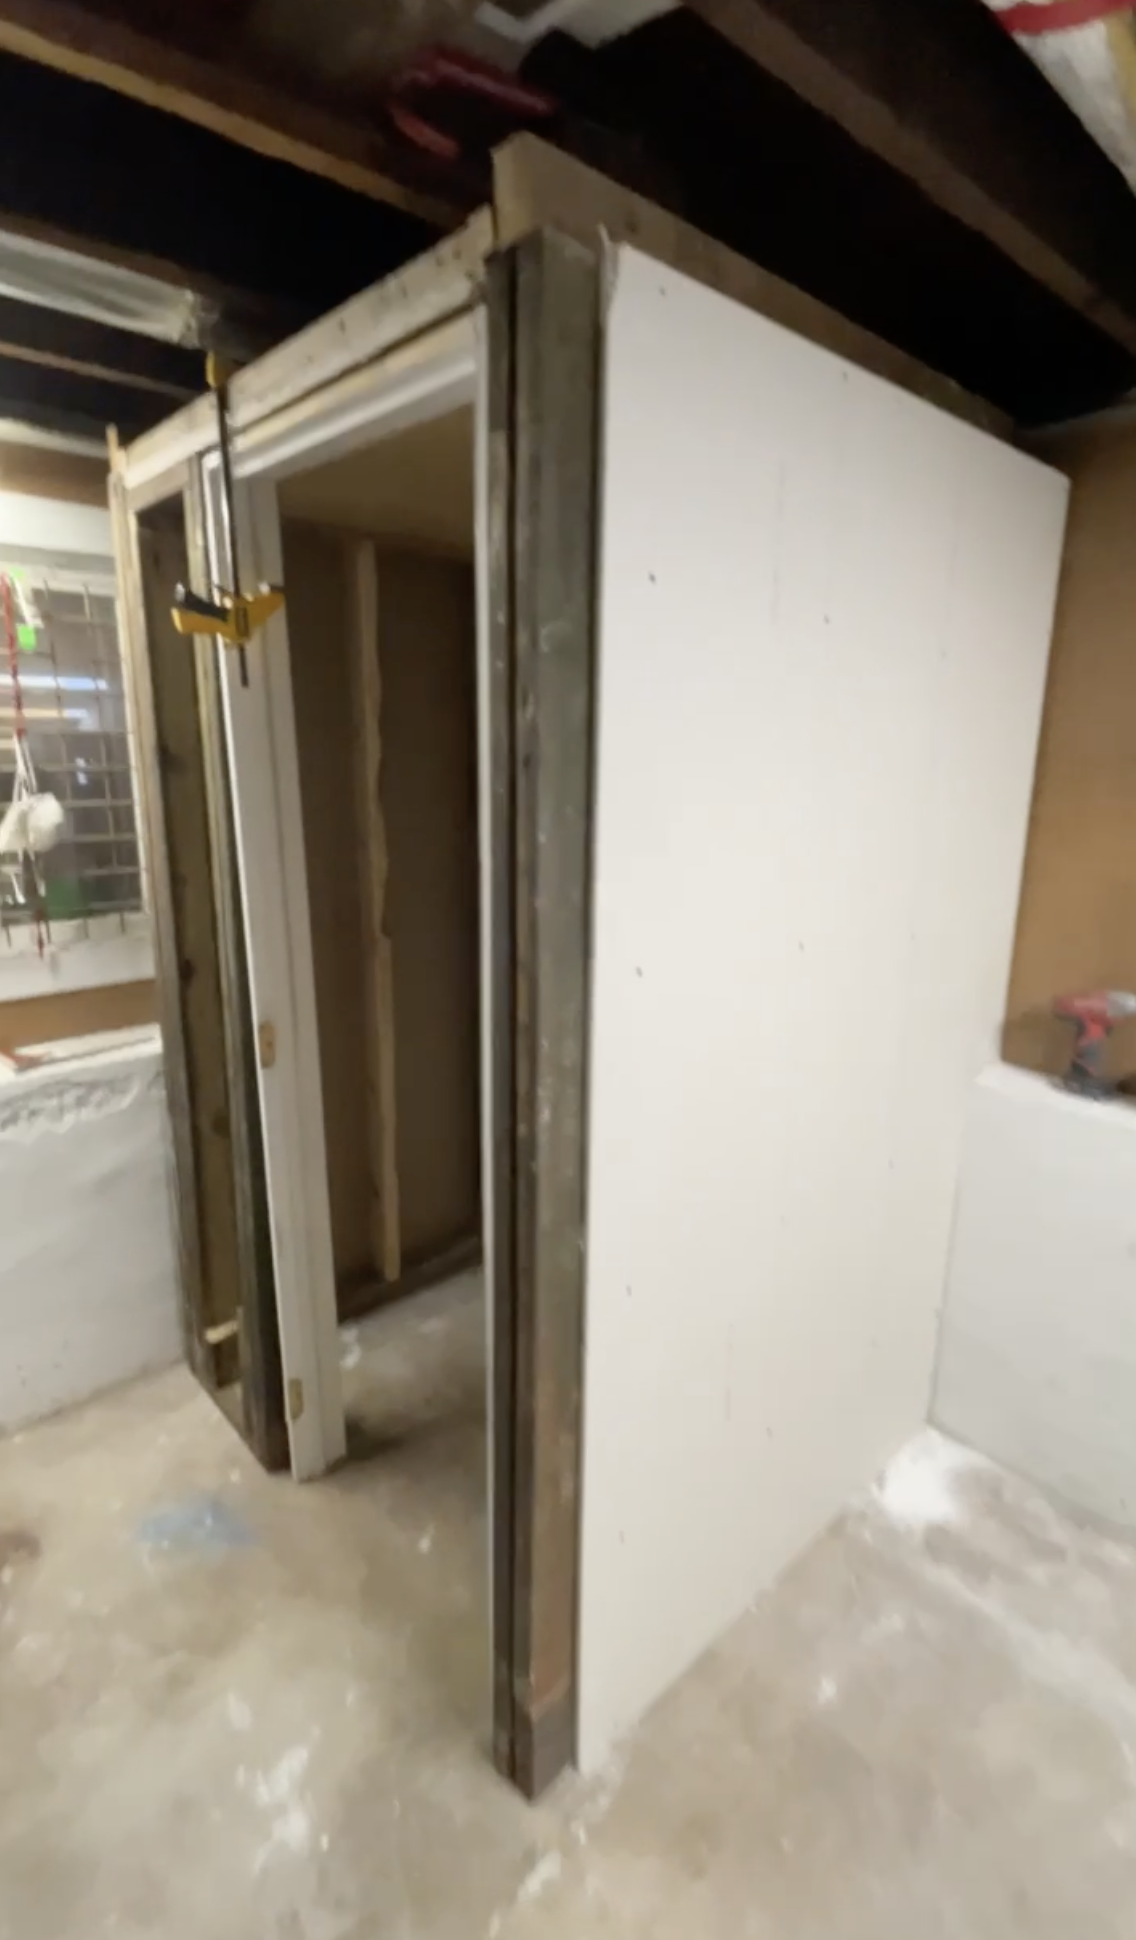
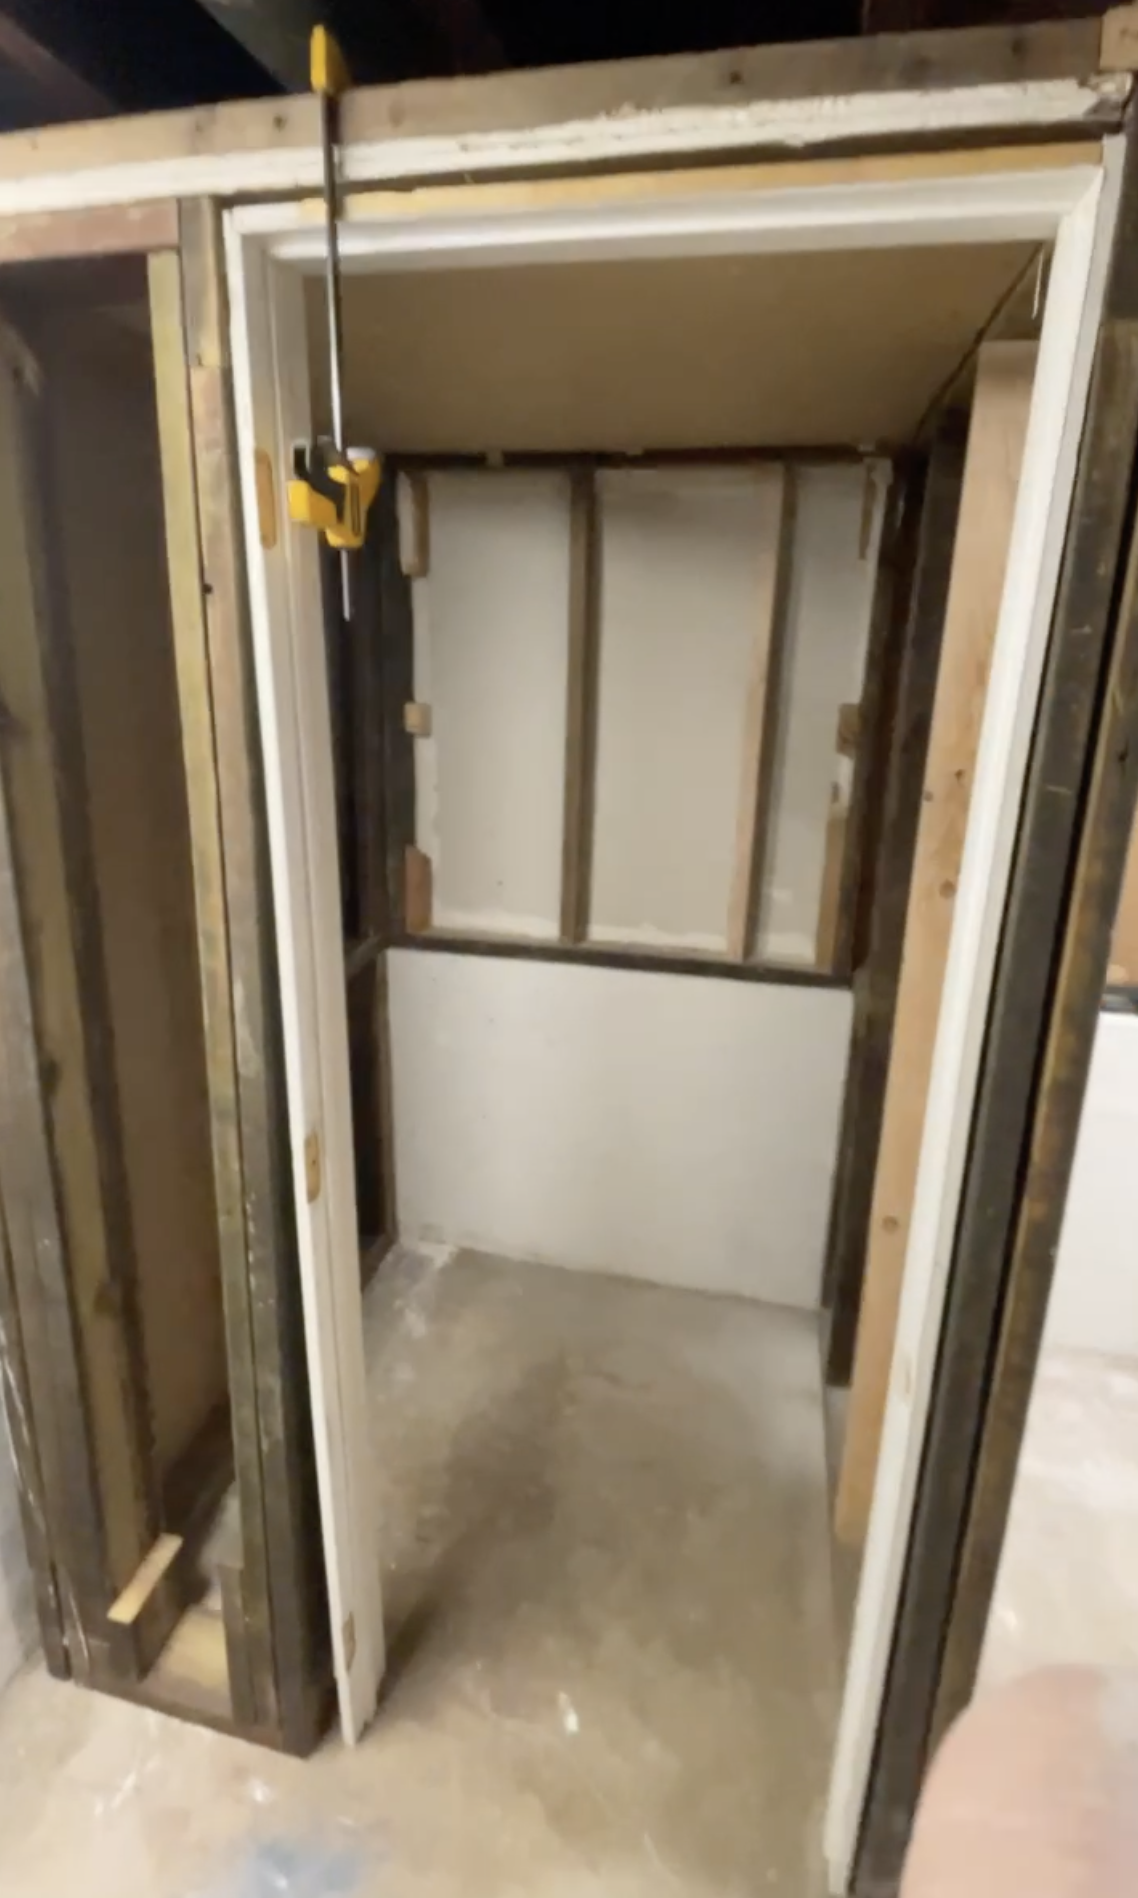
So now I had the booth in place, all the walls, ceiling and door finished and the space ready to get interior sound treatment installed.
I purchased some acoustic foam online as well as a bass trap. With that small of a space, a bass trap was definitely needed to mitigate the boxiness of the space.
One thing I learned when installing the foam which might help others is that yes, you absolutely do need to let the foam sit and expand for at least a full 24 hours or more. This stuff ships in a vacuum-sealed manner and is smooshed down to its smallest possible footprint and you open it all up and are supposed to let it sit and expand fully BEFORE installing it on the walls. I was super impatient. It had taken me months to get this thing ideated and built, and I’d just shelled out to fast-track the final bits, and now I just needed to fill in the fun parts and put my gear in there so I could record!
I thought, pffft— it’s foam! If it’s not done expanding by the time I wanna go install it, then it’ll just finish expanding once it’s on the walls right?
Nope.
Apparently the lesson is: read and follow the directions? Here’s what it looks like even after several days when you don’t wait for full expansion before installing:
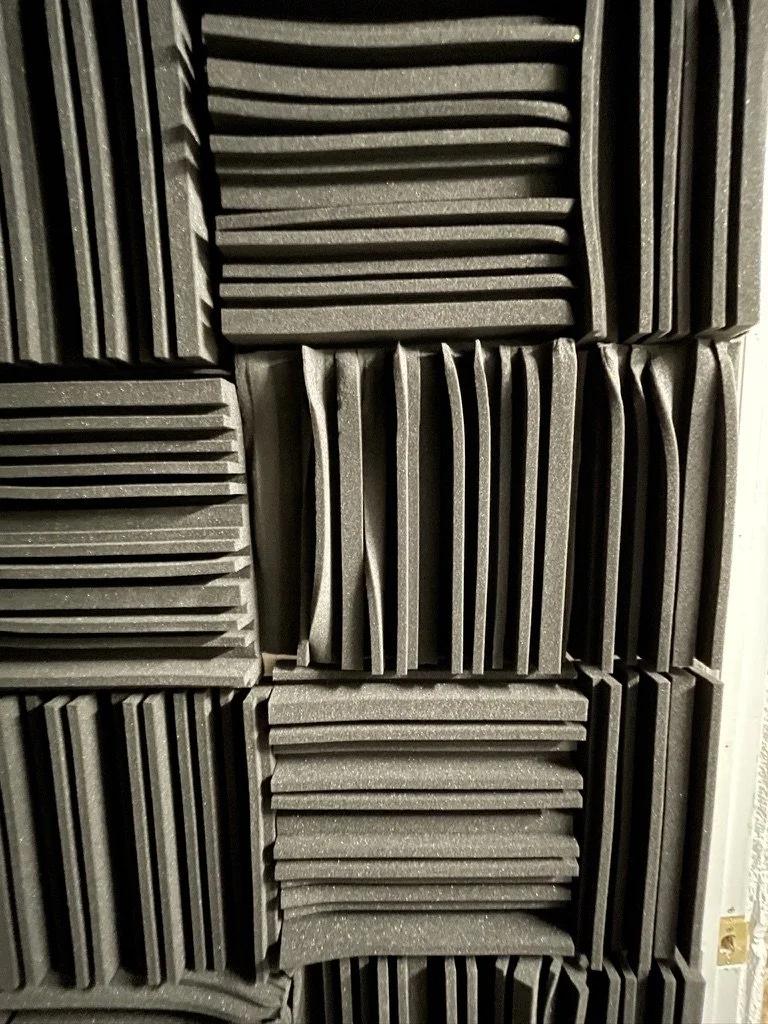
Read and follow the instructions, kids!
I ended up scrapping all of that and rebought some slightly different foam in the off-chance that it was a combo of crappy foam AND poorly-followed directions, and then I let that stuff air out completely before installing it.
Those panels come with adhesive strips on the back and are intended to be an easy way to just pop them onto the walls but it was evident right away that it wasn’t enough adhesion to keep them on there reliably so I ended up using several cans of spray adhesive (and a face mask) to secure all the 12x12” foam panels and the bass trap.
I used carpet tiles for the floor and ceiling, and for the entryway outside of the booth.
I also cut an offset channel through the wall so I could pass wiring through it. A lot of what I’d read advised to not have any of your computer gear in the booth because you don’t want things heating up and then your computer/laptop fan turning on during a recording session. So we cut a hole through the exterior, then measured up about 8” above that hole and cut another hole in the interior. The idea is that you create a rough sound-trap by offsetting the holes, making it harder for sound to bleed through. It’s not perfect, and of course anytime air can get through, sound will find its way in, but it was the best way for me to solve this cheaply and quickly.
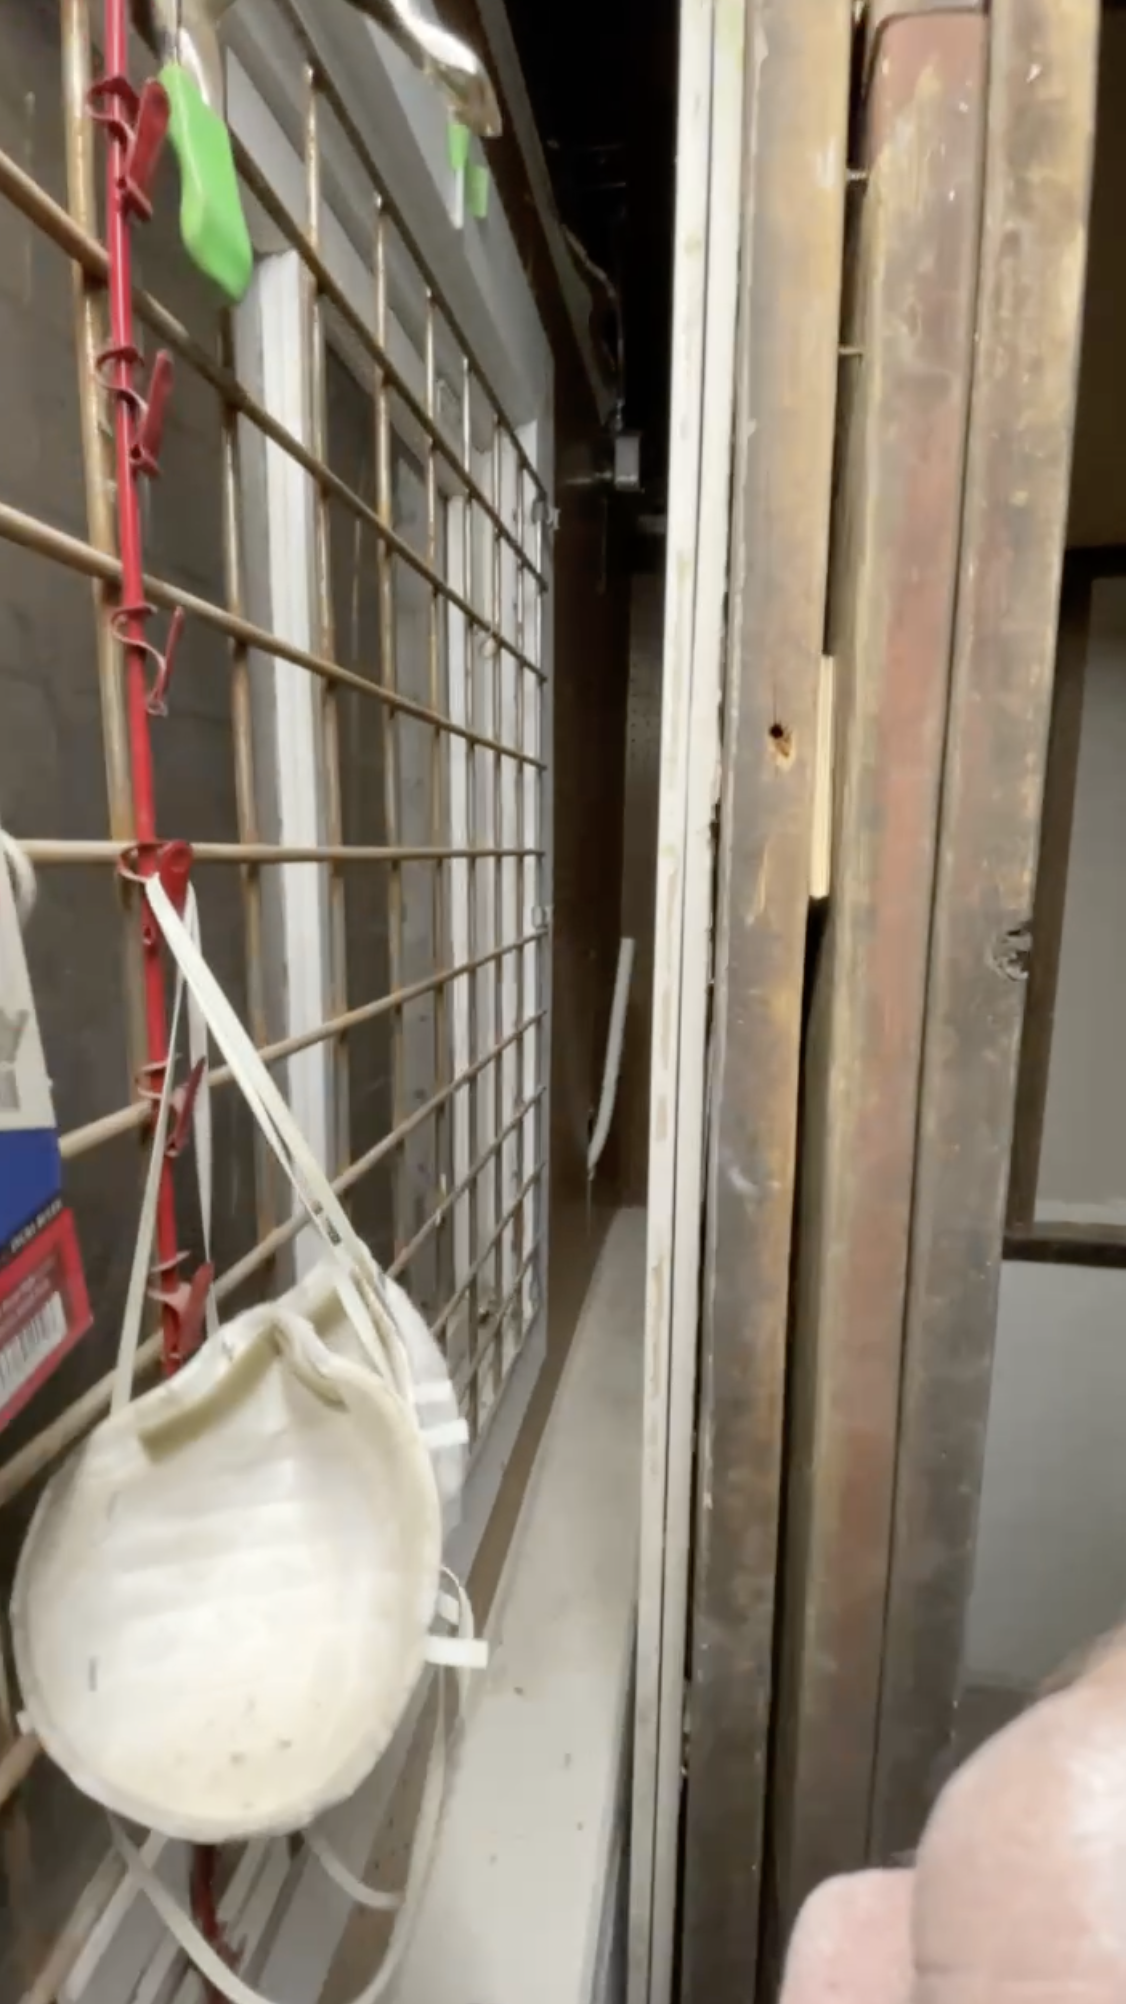
However, I ended up modifying this approach after that first winter; You can see from one of the drywalled photos that I’m right next to an exterior window. This is an old non-insulated basement window in a non-insulated exterior wall. In the winter, it gets wicked cold right there. I didn’t want my computer equipment sitting outside the booth being subjected to big swings in temperature, so I got rid of the external monitor, and just brought the laptop in the booth. I’ve now gone through all the seasons a few times over, and have yet to have my laptop fans turn on. Fingers crossed this remains a non-issue, and I’ll have to plug that hole eventually.
I don’t earn any commissions on these so you’re not hurting my feelings if you don’t use these exact materials:
Foam Panels:
I needed two of these packs to cover everything.
https://www.amazon.com/dp/B0BM4JP6S2?ref_=ppx_printOD_title_dt_b_fed_asin_title_0_0&th=1
Bass Traps:
https://www.amazon.com/dp/B08M23BMYH?ref=ppx_yo2ov_dt_b_fed_asin_title
Spray Adhesive:
I think I used 4 cans total.
https://www.homedepot.com/p/3M-14-6-oz-Hi-Strength-90-Spray-Adhesive-90-DSC/316351910
Carpet Tiles:
Door Seal (bottom):
Door Seal (sides and top):
I couldn’t find the exact ones I bought, but pretty sure this is it:
Offset Cable Install Kit:
Rockwool Insulation:
I used three bundles.
Drywall:
I think the final count was 10 sheets? Also the prices on this stuff swing wildly. When I looked up my receipts, I found that the orders I made online for pickup were sometimes half of what I paid just walking into the store.
Negligible / Cheap Expenses:
-Drywall screws
-Corner beads
-Drywall tape
-Joint compound
-Caulk
-Used doorknob
Customizing — this is obviously dealer’s choice and you can go nuts here, so I’m separating it from the actual build materials.
Lighting:
Most people in their booths, use LED strip lighting, which is extremely cheap, and you can find them everywhere. I personally hate the look of the really cheap stuff where you actually can see the individual LEDs, and since I’d be spending a lot of time inside the booth, I wanted something that I wasn’t going to hate. I tested out a few things from off the shelf at Home Depot and landed on this one for the main lighting. It has a remote control I don’t ever use, it’s app-controlled which I don’t use, and it does a bunch of different color modes which I also don’t use. I just use the white light and the inline switch I have on the floor and can hit it with my foot. The whitest it gets is still pretty warm IMO but I’d rather that than very bluish white light. At 16ft, it’s long enough to go from the floor, up one wall, and then the perimeter of the ceiling and provides very even lighting. I just wish it was a bit brighter but it does the trick.
I supplement this light with a bi-color overhead light I’d purchased a year or so earlier. I didn’t buy it for this project but just chucked it in there because I wasn’t using it for anything else. It has three settings, warm, bright, and a mix of the two. It has an adhesive backing that was plenty strong enough to stay on the ceiling tile, and it sticks to that mount via magnets. It’s battery powered so I do need to charge it and it doesn’t last all day but I don’t really need it to work in there, it’s just supplemental.
https://www.amazon.com/dp/B0CJ8ZTDWK?ref_=ppx_hzsearch_conn_dt_b_fed_asin_title_13&th=1
Desk:
I had some pretty specific criteria for this and I’m glad where it landed. I’m 6’1” and wanted a convertible standing desk that was tall enough to have my elbows on the desk at a comfy height for me since that’s the mode I’d be working in most of the time. I wasn’t sure that I’d ever be sitting but I wanted that option. I also needed it to be small enough so that it would fit inside my small 3x3’ space and I wanted it to be wood in both material and color. I poked around on Facebook Marketplace and found this which was basically a slam dunk:
It’s sold through a ton of different outlets and I had saved the original screenshot from when I bought it used from FB and just did an image search to find the above link. I think I paid around $80 from a local seller.
A bonus that I didn’t think I needed but totally did, was the fact that this thing is called “Origami” for a reason. It’s I guess designed for WFH people who want to store this workspace completely away when not in use so it folds up pretty flat. Turns out I would have needed to completely disassemble this and rebuild it inside if it didn’t fold up like this. Since the interior of the booth was so small, it couldn’t make any of the turns that would’ve been no problem entering any normal size room. So this was a huge score. It’s not motorized but I don’t care; I’m standing 99.9% of the time and the motor would just be one more thing to break or go wrong with it over time. The manual operation is heavy and awkward with a desktop full of gear but whatever.
Other:
Laptop Stand
Monitor
Keyboard
Mouse
-All of this I already had, nothing purchased specific for the booth. I don’t have a separate workspace in the house, so all of this lives in the booth. When I don’t want to be in the booth, I just take my laptop out.
Recording gear:
-Sennheiser MKH 416
-Scarlett Solo Interface
-Rode PSA1+ Mic Arm
-WBC XLR with Mogami wire and Neutrik connectors
-I alternate between a cheap Amazon pop filter and a cheap Amazon windscreen (I misplaced the cool-looking one that comes with the 416, and they’re $65 to replace)
Software:
-Reaper
-Izotope RX11
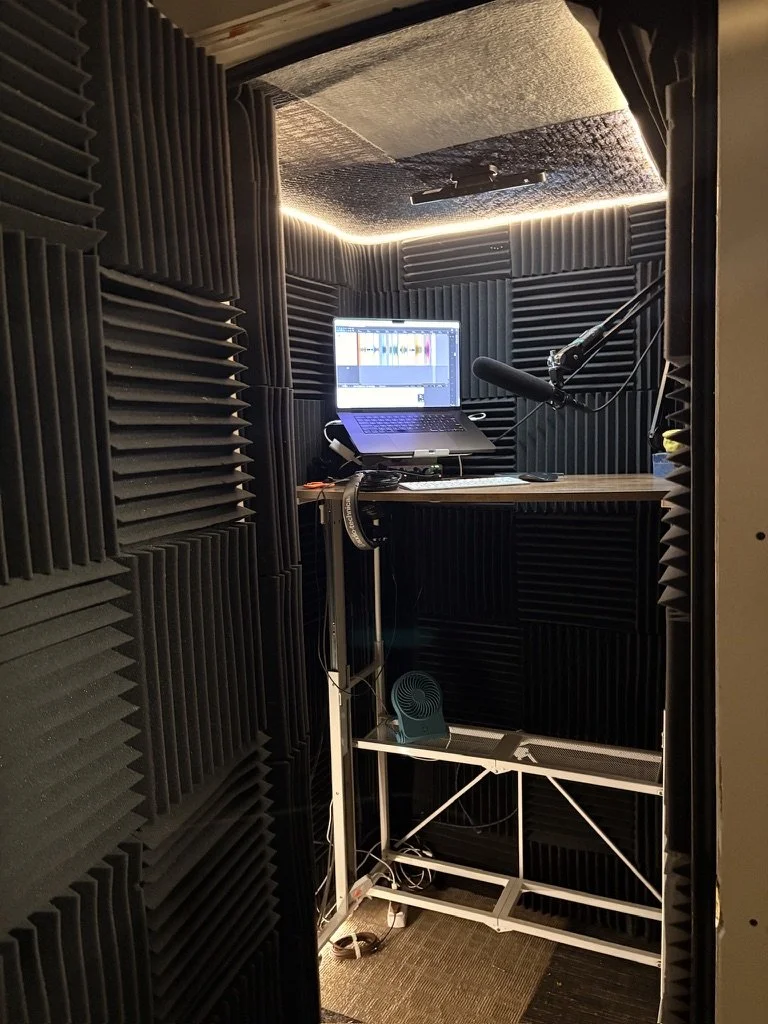
The finished build.
The vast majority of the actual construction choices were made to be cheap and fast. There are obvious areas here for improvement. Here’s what I would do differently if I were to build something again:
Build it bigger
I used an existing frame from a project that someone else built
Use actual Green Glue acoustic caulk
I’d thought this was prohibitively expensive for me at the time ($28/tube) but in hindsight this was foolish thinking and I should have spent money for it since it’s not something I can redo.
Better door seals and high-quality door sweep
The high-quality automatic door sweeps are pricey (around $150) but this is something I can upgrade to at a later time if I want.
I’d initially bought better quality door seals but they were bulky and I could not get them to fit properly without heavily modifying the door frame and/or door. I was already vastly underlearned on hanging the door and I wanted to move on so made it work with other materials, but I’m fairly certain that the door seams are my weakest link in terms of sound that bleeds in from outside the booth. The biggest culprit being the furnace that’s a straight shot about 15ft away. I don’t hear it during the summer when the AC is on, but I need to turn off the heat during the winter, to record. The family is not fond of that, but I have an app-controlled thermostat and only turn it off when actively recording. But it’s a lot to juggle and likely something I can fix if I throw more money at the problem, which I’m not ready to do just yet.
More sound treatment in the ceiling
Our construction project in the rest of the house ended up throwing me a curveball after I’d already finished the booth. Our contractor found a way to make the 2nd floor staircase less cumbersome (2nd fl is converted attic space, so the original stairwell was very weird), but it needed to be reoriented 90 degrees so now the stairwell terminates directly over the booth. Yay!
Also during said construction project, some ductwork was completely removed from over my booth so now there’s just an empty, derelict duct there which I can now fill with Rockwool
Both of these are possible to fix now, with some sweat equity and another sheet of drywall, and a pack of Rockwool.
Would I build another one?
Maybe. My goal is that my voiceover business will scale to a level where I can just pull the trigger on a used WhisperRoom or StudioBricks booth.
If I were moving to a similar house with an unfinished basement and I didn’t want to shell out thousands for something prefab, I would probably do this again, but in a much more efficient way, and then hire out for ALL the labor and be done in much less time. I’m sure that the months of work I actually put in could have been done in one afternoon by my DIY Wizard friend. As I said earlier, I’m a competent general handyman and a skilled mechanic, but carpentry is black magic and is not for me.
Should you do this?
If you’re looking to upgrade your closet booth and don’t have the ~$5-8k for a used WhisperRoom, then you should probably build your own, or get a carpenter to come in and look at your space to tell you what’s possible from a general footprint standpoint, and then show them the video from Sound Headquarters so they can mimic the offset framing, floating floor, and buy the proper materials.
Here’s my cost breakdown:
| Item | Unit Cost | Qty. | Total |
|---|---|---|---|
| MATERIALS | |||
| Drywall | $12.00 | 10 | $120.00 |
| Rockwool | $84.00 | 3 | $252.00 |
| Foam Panels | $55.00 | 2 | $110.00 |
| Bass Traps | $33.00 | 1 | $33.00 |
| Spray Adhesive | $17.00 | 4 | $68.00 |
| Carpet Tiles | $40.00 | 1 | $40.00 |
| Door Seal (bottom) | $19.00 | 1 | $19.00 |
| Door Seal (sides and top) | $18.00 | 1 | $18.00 |
| Offset Cable Install Kit | $25.00 | 1 | $25.00 |
| Drywall screws, Corner beads, Drywall tape, Joint compound, Caulk | $65.00 | 1 | $65.00 |
| TOTAL MATERIALS: | $750.00 | ||
| LABOR | |||
| DIY Wizard Buddy (negotiated partial-day-rate) | $600.00 | 1 | $600.00 |
| Task Rabbit Dude (hourly rate) | $46.45 | 7.25 | $336.76 |
| TOTAL LABOR: | $936.76 | ||
| GRAND TOTAL: | $1,686.76 | ||
I’m sure I forgot something in here somewhere but this post is already way too long. I would love to answer anyone’s questions about DIY booths as I’ve now done several and have learned a ton along the way. In the end, all you really need is a closet with a bunch of clothes hanging in there, but the convenience of my current booth is incredible and if you have solid construction know-how, you could probably do a similar build to this one for less money since you wouldn’t have to spend $$ on labor. Labor accounted for roughly 2/3 of my spend.
Hit me up in the comments if you have any questions on your own potential project or if you have suggestions that any of us could use to improve or correct what I have here.
Thanks so much for reading.